Menu
Shop By Event
Weddings
Ceremony
Reception
Candles
Vases
Aisle Décor
Lighting
Charger Plates
Mirrors
Centerpieces
Bachelorette Party
Engagement Party
Bridal Shower
Birthday Party
Anniversary
Seasonal Parties
Valentine's Day
Easter
Fourth of July
Fall
Halloween
Thanksgiving
Advent
Christmas
New
Sale
Naturals & Florals
Botanicals
Wheat and Cotton
Grapevines
Gyp, Baby’s Breath, Caspia
Fruits, Pine Cones, Berries, Pods
Boxwood, Hops
Lavender
Flowers
Stemmed
Bouquets
Petals
Succulents
Wreaths
Greenery and Garland
Leaves
Grass Mats
Palms & Ferns
Berries
Garlands
Boxwood
Pots & Planters
Floral Supplies
Bouquet Supplies
Compote
Confetti
Corsage & Bouttenieres
Foam & Adhesives
Vases
Tree Slabs
New
Sale
Crafts
Craft Supplies
Foam
Tapes
Twine
Glitter
Gift Packaging
Favors
Fabric & Ribbon
Christmas Supplies
Lace
Burlap
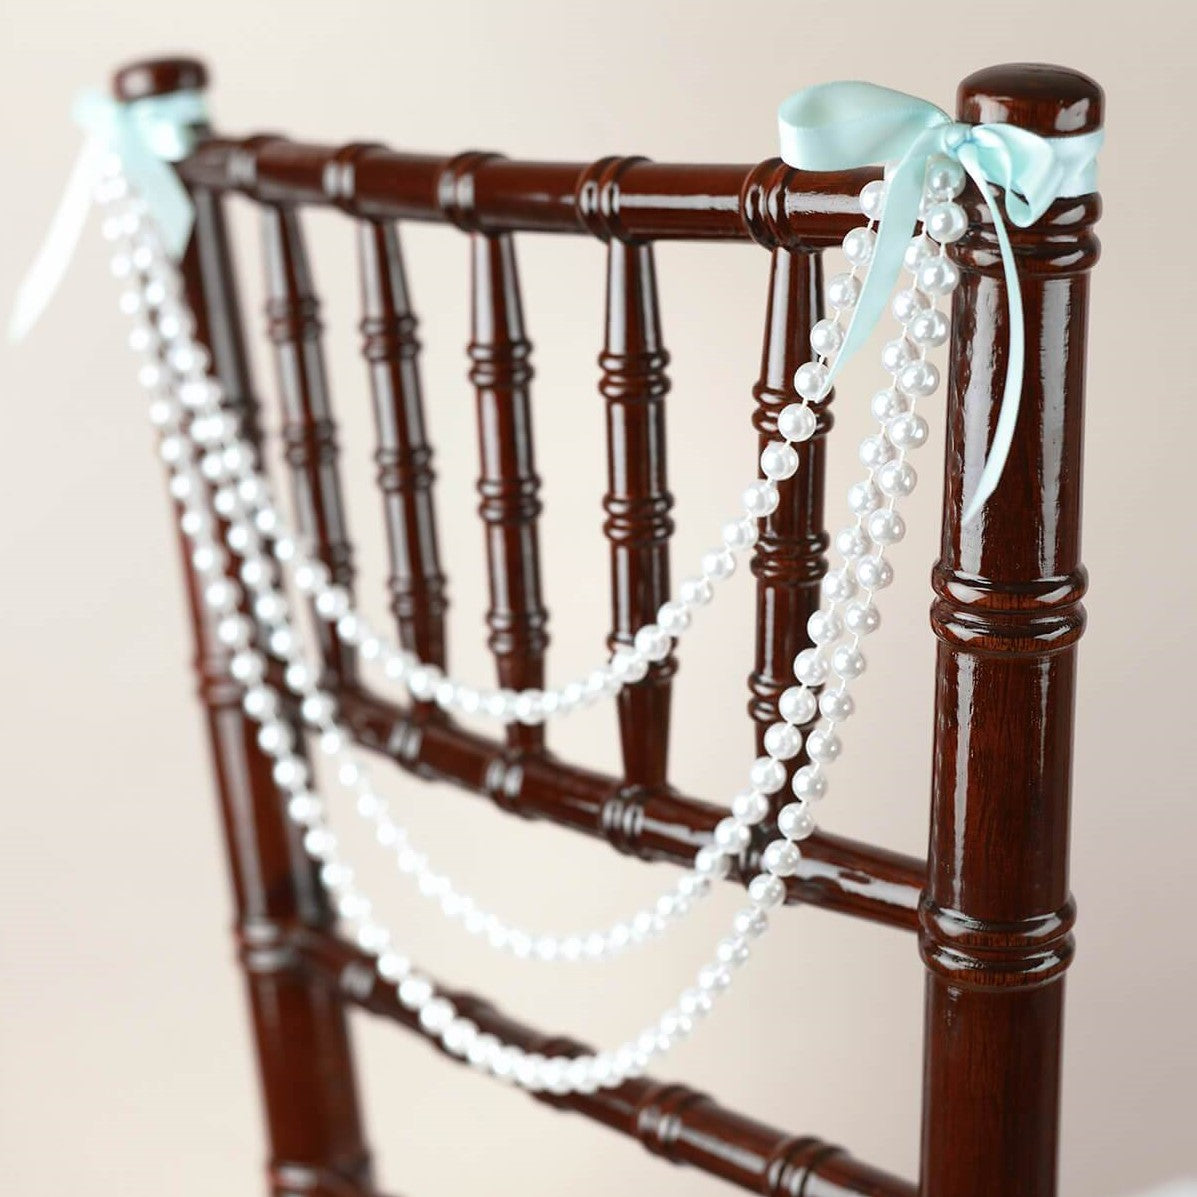
Pearls & Diamonds
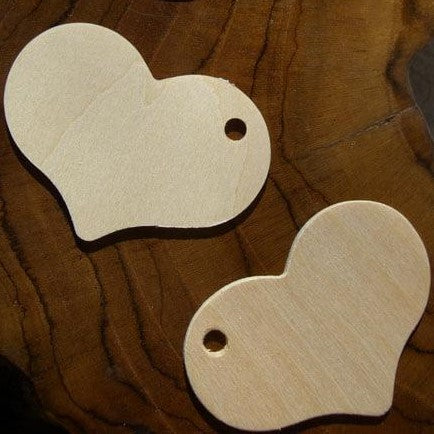
Wood Crafts
Boxes
Branches
Wood Burning Tools
Slabs
Pine Cones
New
Sale
Vases
Cylinder Vases
Square Vases
Flower Vases
Bud Vases
Hanging Vases
Mason Jars
Bottles And Jars
Vintage Bottles & Holders
Hurricane Vases & Shades
Bubble Ball Vases
Metal Vases
Compote
Apothecary Jars
Vase Filler
Acrylic Diamonds
Flat Gems
River Gravel
Sea Glass
Crushed Glass
Shells
Water Pearls
New
Sale
Candles & Lighting
Candles
Unscented Votive Candles
Scented Votive Candles
Pillar Candles
Floating Candles
Tealight Candles
Flameless Candles
Luminary Candles
Taper Candles
Fuel Cells
Sphere Candles
Candle Holders
Votive Candle Holders
Pillar Candle Holders
Floating Candle Holders
Tealight Candle Holders
Taper Candle Holders
Hanging Candle Holders
Mercury Candle Holders
Metallic Candle Holders
Coasters/Pillar Plates
Wooden Holders
Lighting
String Lights
LED Lighting
Light Bulbs & Batteries
LED Orbs
Marquee Letters & Signs
Light Bases
New
Sale
Décor
Garden & Outdoor
Shepherd Hooks
Lanterns
Lighting
Pots & Planters
Buckets & Tubs
Garden Décor
Nautical Décor
Terrarium
Home & Indoor
Mirrors
Lighting
Easels & Frames
Bowls & Trays
Frames
Beverage Bar Supplies
Linens
Tablescape
Charger Plates
Napkin Rings
Glassware
Serveware
Linens
Chair Décor
Unique Décor
Apothecary Jars
Birds & Bird Cages
Feathers
Fabric & Ribbon
Pearls & Lace
Tulle
Charger Plates
New
Sale
Ideas & Inspiration
Sale
Help
FREE SHIPPING ON ORDERS OVER $79
1-800-928-6175
Login
United States (USD $)
Canada (CAD $)
United States (USD $)
0
1-800-928-6175
Help
FREE SHIPPING ON ORDERS OVER $79
Currency
United States (USD $)
Canada (CAD $)
United States (USD $)
Login
0
Your Cart is Empty
Continue Shopping
$0.00
Subtotal
Taxes and
shipping
calculated at checkout
Checkout
Shop By Event
Weddings
Ceremony
Reception
Candles
Vases
Aisle Décor
Lighting
Charger Plates
Mirrors
Centerpieces
Bachelorette Party
Engagement Party
Bridal Shower
Birthday Party
Anniversary
Seasonal Parties
Valentine's Day
Easter
Fourth of July
Fall
Halloween
Thanksgiving
Advent
Christmas
New
Sale
Naturals & Florals
Botanicals
Wheat and Cotton
Grapevines
Gyp, Baby’s Breath, Caspia
Fruits, Pine Cones, Berries, Pods
Boxwood, Hops
Lavender
Flowers
Stemmed
Bouquets
Petals
Succulents
Wreaths
Greenery and Garland
Leaves
Grass Mats
Palms & Ferns
Berries
Garlands
Boxwood
Pots & Planters
Floral Supplies
Bouquet Supplies
Compote
Confetti
Corsage & Bouttenieres
Foam & Adhesives
Vases
Tree Slabs
New
Sale
Crafts
Craft Supplies
Foam
Tapes
Twine
Glitter
Gift Packaging
Favors
Fabric & Ribbon
Christmas Supplies
Lace
Burlap
Pearls & Diamonds
Wood Crafts
Boxes
Branches
Wood Burning Tools
Slabs
Pine Cones
New
Sale
Vases
Cylinder Vases
Square Vases
Flower Vases
Bud Vases
Hanging Vases
Mason Jars
Bottles And Jars
Vintage Bottles & Holders
Hurricane Vases & Shades
Bubble Ball Vases
Metal Vases
Compote
Apothecary Jars
Vase Filler
Acrylic Diamonds
Flat Gems
River Gravel
Sea Glass
Crushed Glass
Shells
Water Pearls
New
Sale
Candles & Lighting
Candles
Unscented Votive Candles
Scented Votive Candles
Pillar Candles
Floating Candles
Tealight Candles
Flameless Candles
Luminary Candles
Taper Candles
Fuel Cells
Sphere Candles
Candle Holders
Votive Candle Holders
Pillar Candle Holders
Floating Candle Holders
Tealight Candle Holders
Taper Candle Holders
Hanging Candle Holders
Mercury Candle Holders
Metallic Candle Holders
Coasters/Pillar Plates
Wooden Holders
Lighting
String Lights
LED Lighting
Light Bulbs & Batteries
LED Orbs
Marquee Letters & Signs
Light Bases
New
Sale
Décor
Garden & Outdoor
Shepherd Hooks
Lanterns
Lighting
Pots & Planters
Buckets & Tubs
Garden Décor
Nautical Décor
Terrarium
Home & Indoor
Mirrors
Lighting
Easels & Frames
Bowls & Trays
Frames
Beverage Bar Supplies
Linens
Tablescape
Charger Plates
Napkin Rings
Glassware
Serveware
Linens
Chair Décor
Unique Décor
Apothecary Jars
Birds & Bird Cages
Feathers
Fabric & Ribbon
Pearls & Lace
Tulle
Charger Plates
New
Sale
Ideas & Inspiration
Sale
Home
/
Crafts
Featured
Best selling
Alphabetically, A-Z
Alphabetically, Z-A
Price, low to high
Price, high to low
Date, old to new
Date, new to old
Craft Supplies
Craft Supplies
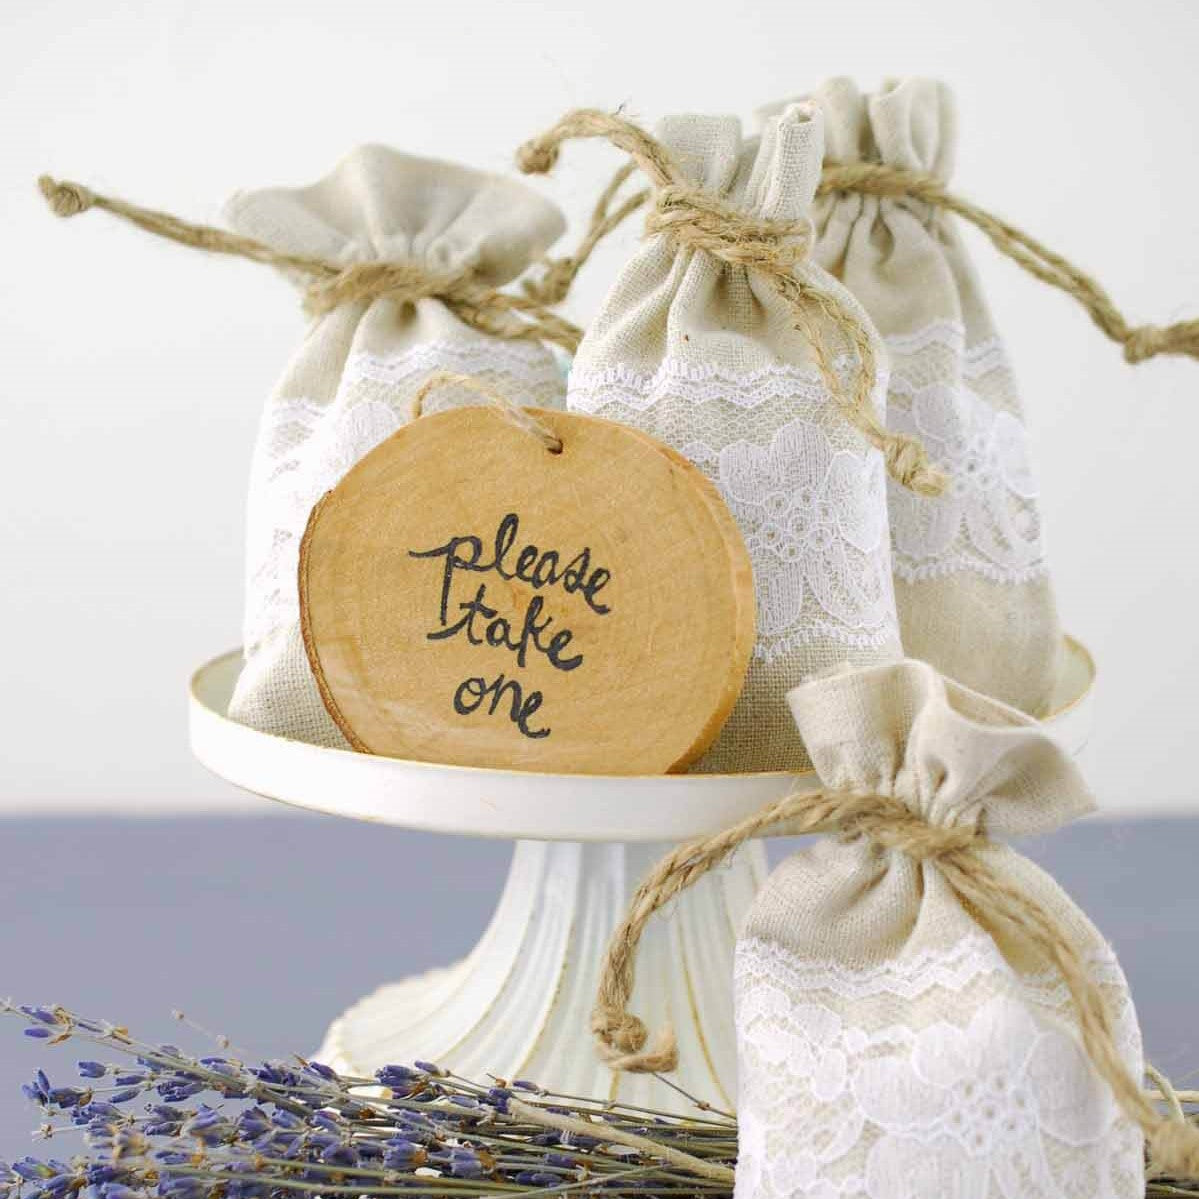
Favors
Favors
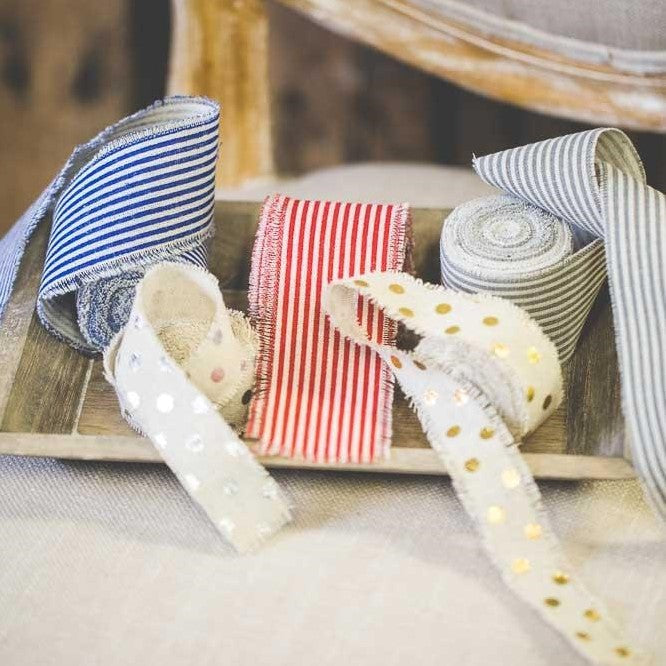
Ribbon
Ribbon
Christmas Supplies
Christmas Supplies
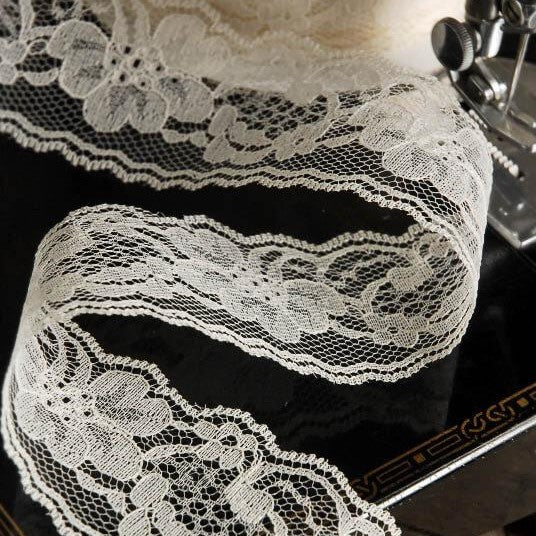
Lace
Lace
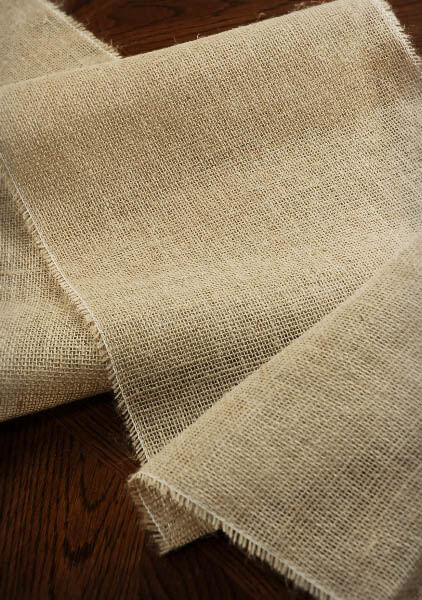
Burlap
Burlap
Pearls & Diamonds
Pearls & Diamonds
Wood Crafts
Wood Crafts
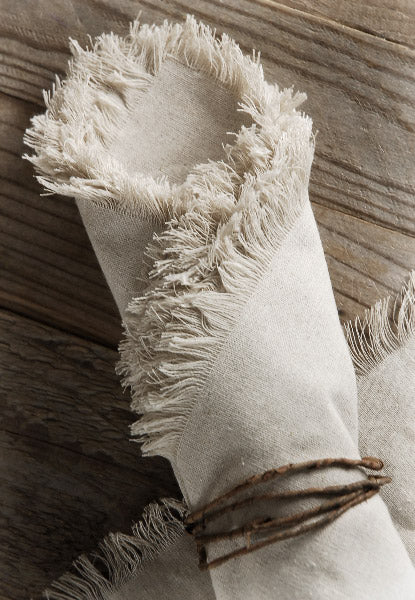
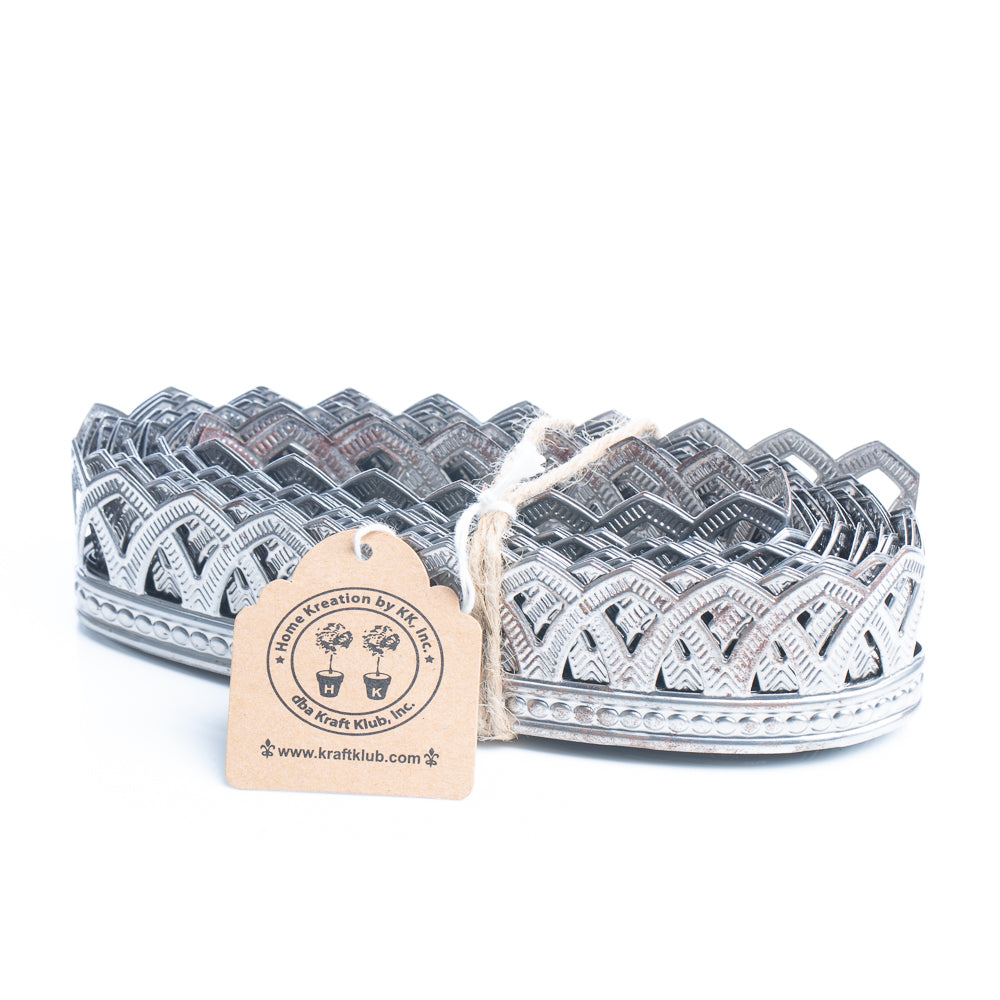
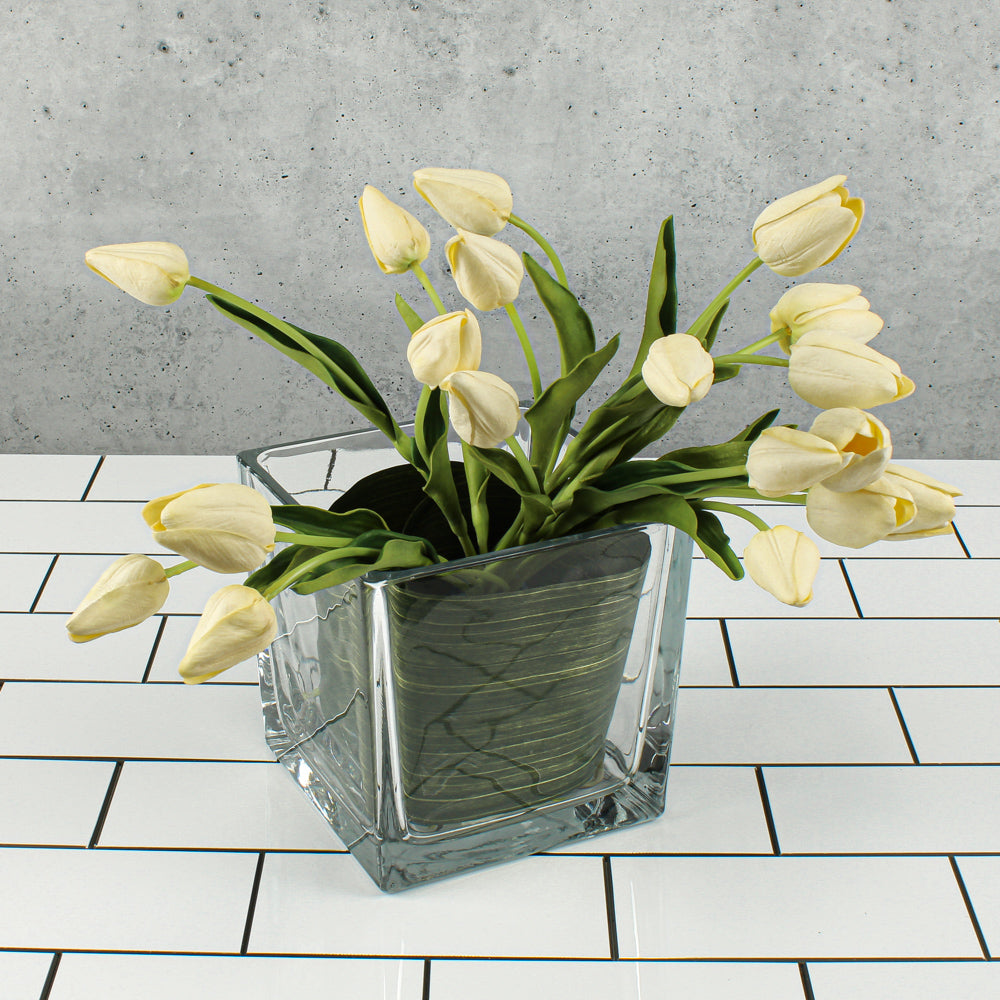
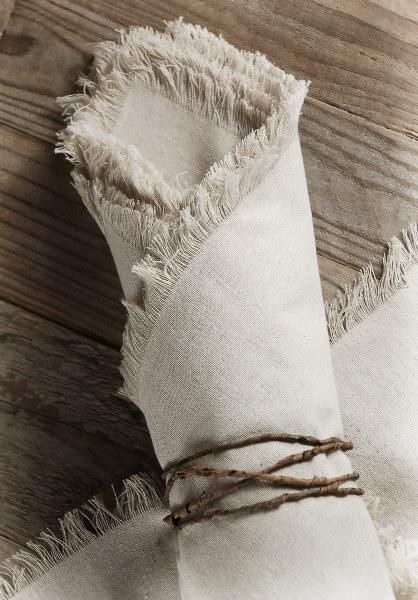
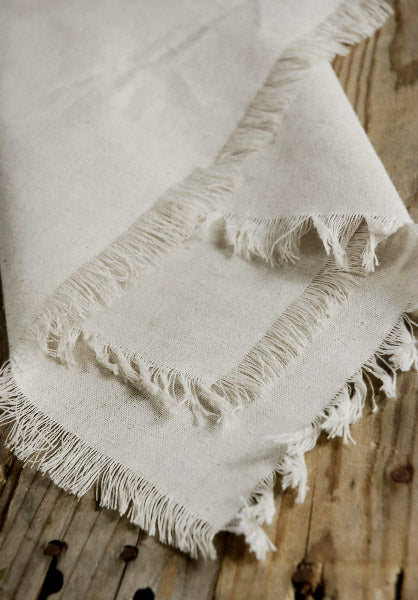
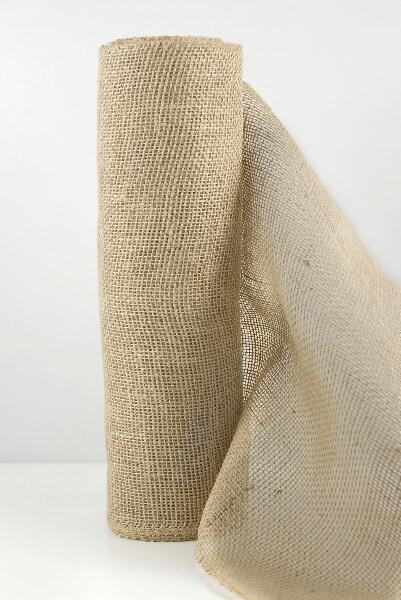
12 Linen Napkins with Fringe Edge 16in bridal-showercraftseventsribbonfallbowl-floating-candle-holderlinensreceptiontablescapethanksgiving
Quick View
12 Linen Napkins with Fringe Edge 16in
$24.99
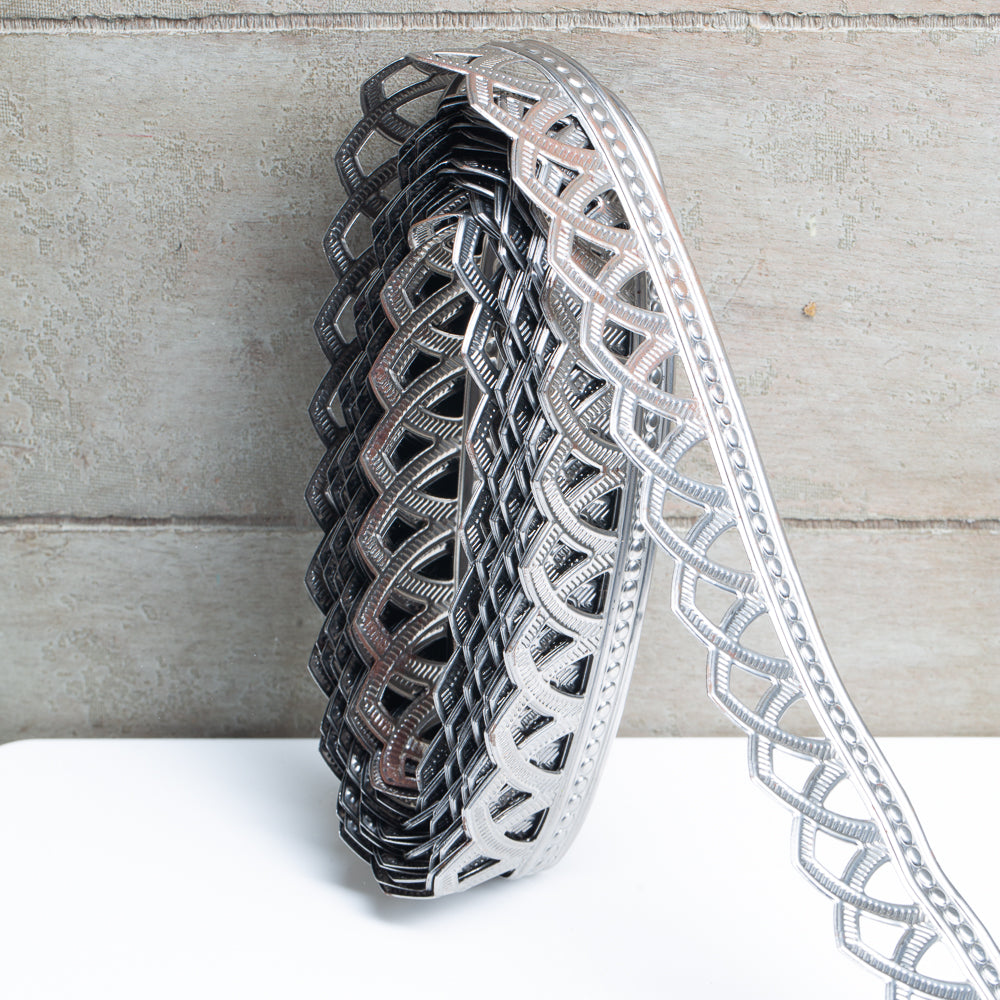
Metal Trim Ribbon Roman Trim 1in x 15ft craftseventsribbonbowl-floating-candle-holderunique-decor
Quick View
Metal Trim Ribbon Roman Trim 1in x 15ft
$17.99
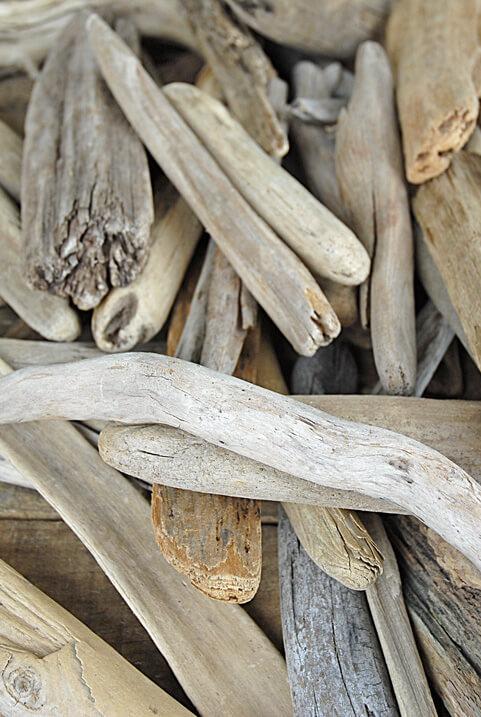
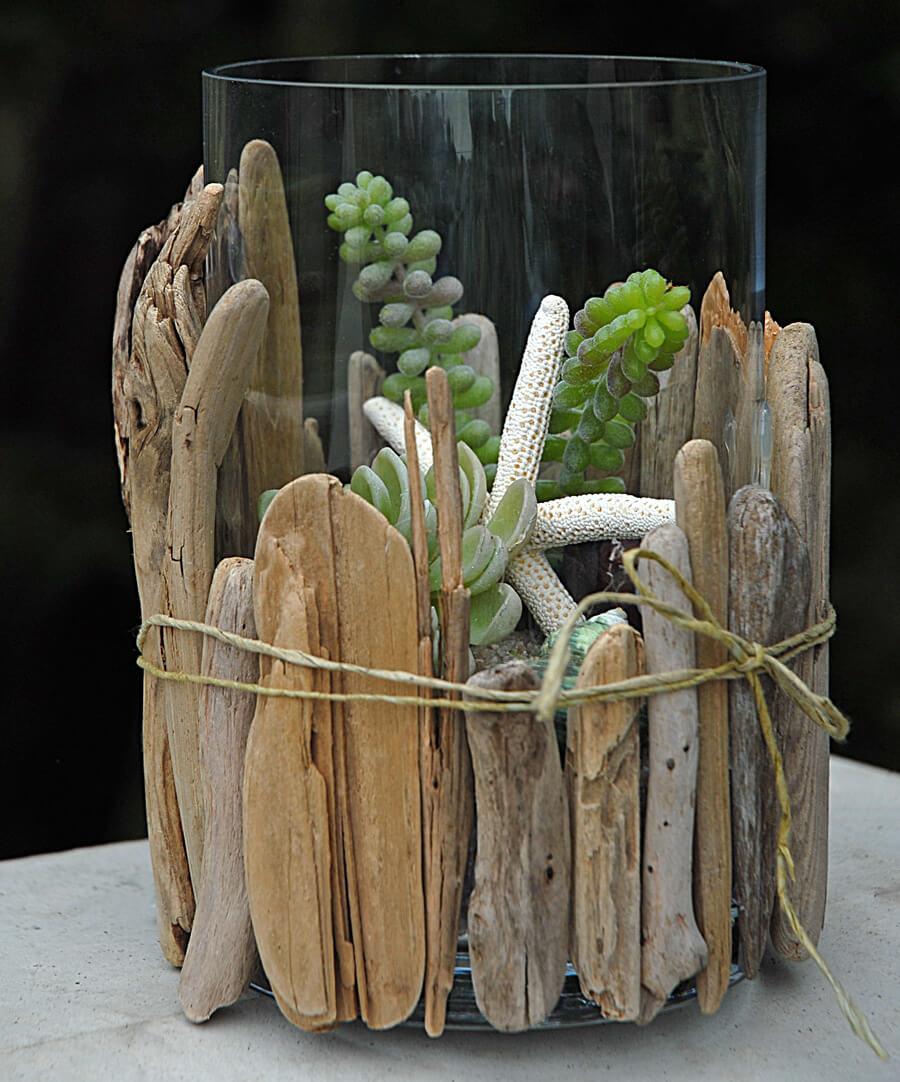
Lake Superior Driftwood 5"-12" (40 pcs) birthday-party-1botanicalsbranchescraftseventsbowl-floating-candle-holdergarden-outdoorhome-indoorluaunaturals-floralsnautical-decorwood-crafts
Quick View
Lake Superior Driftwood 5"-12" (40 pcs)
$34.99
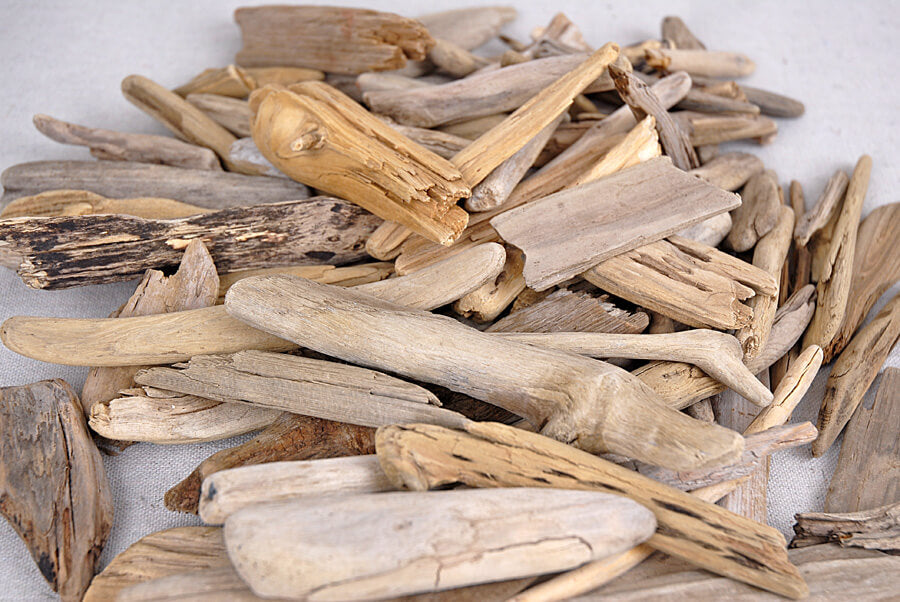
Lake Superior Driftwood 2"-6" (100 pcs) birthday-party-1botanicalscraftseventsbowl-floating-candle-holdergarden-outdoorhome-indoorluaunaturals-floralsnautical-decorwood-crafts
Quick View
Lake Superior Driftwood 2"-6" (100 pcs)
$19.99
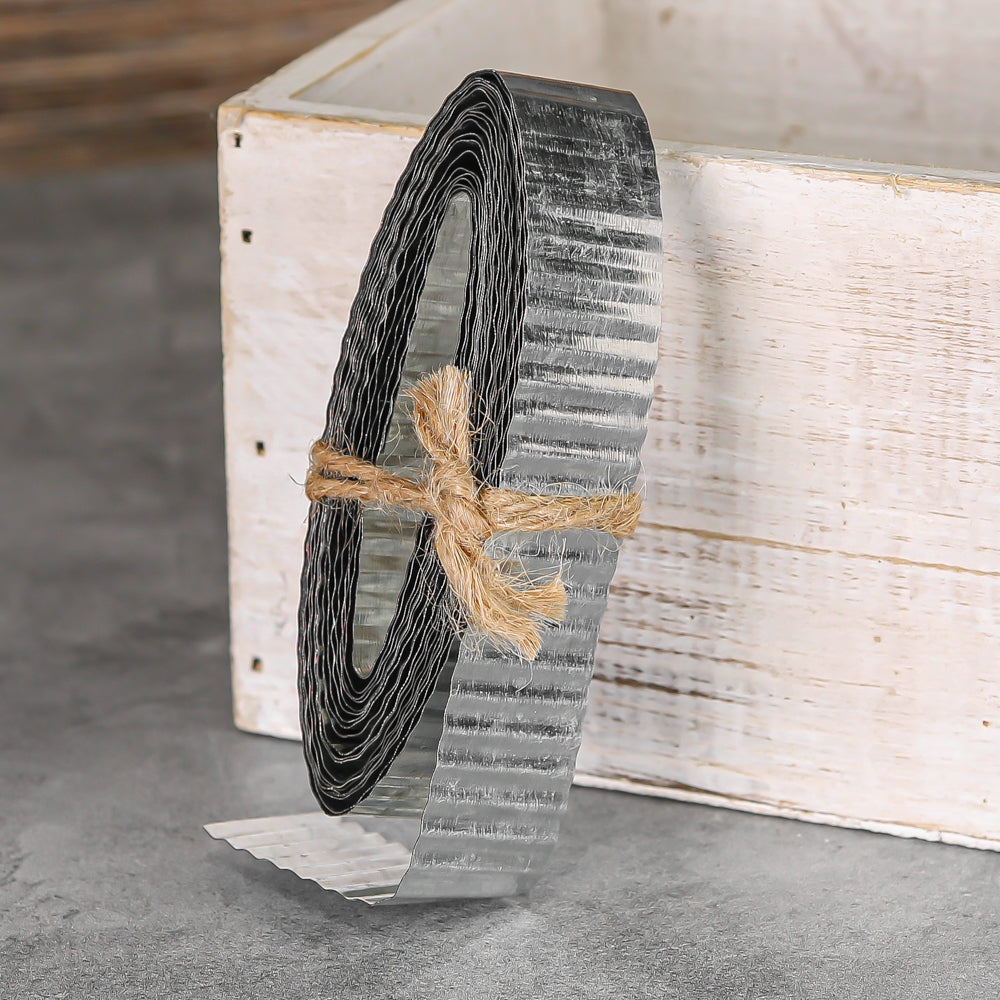
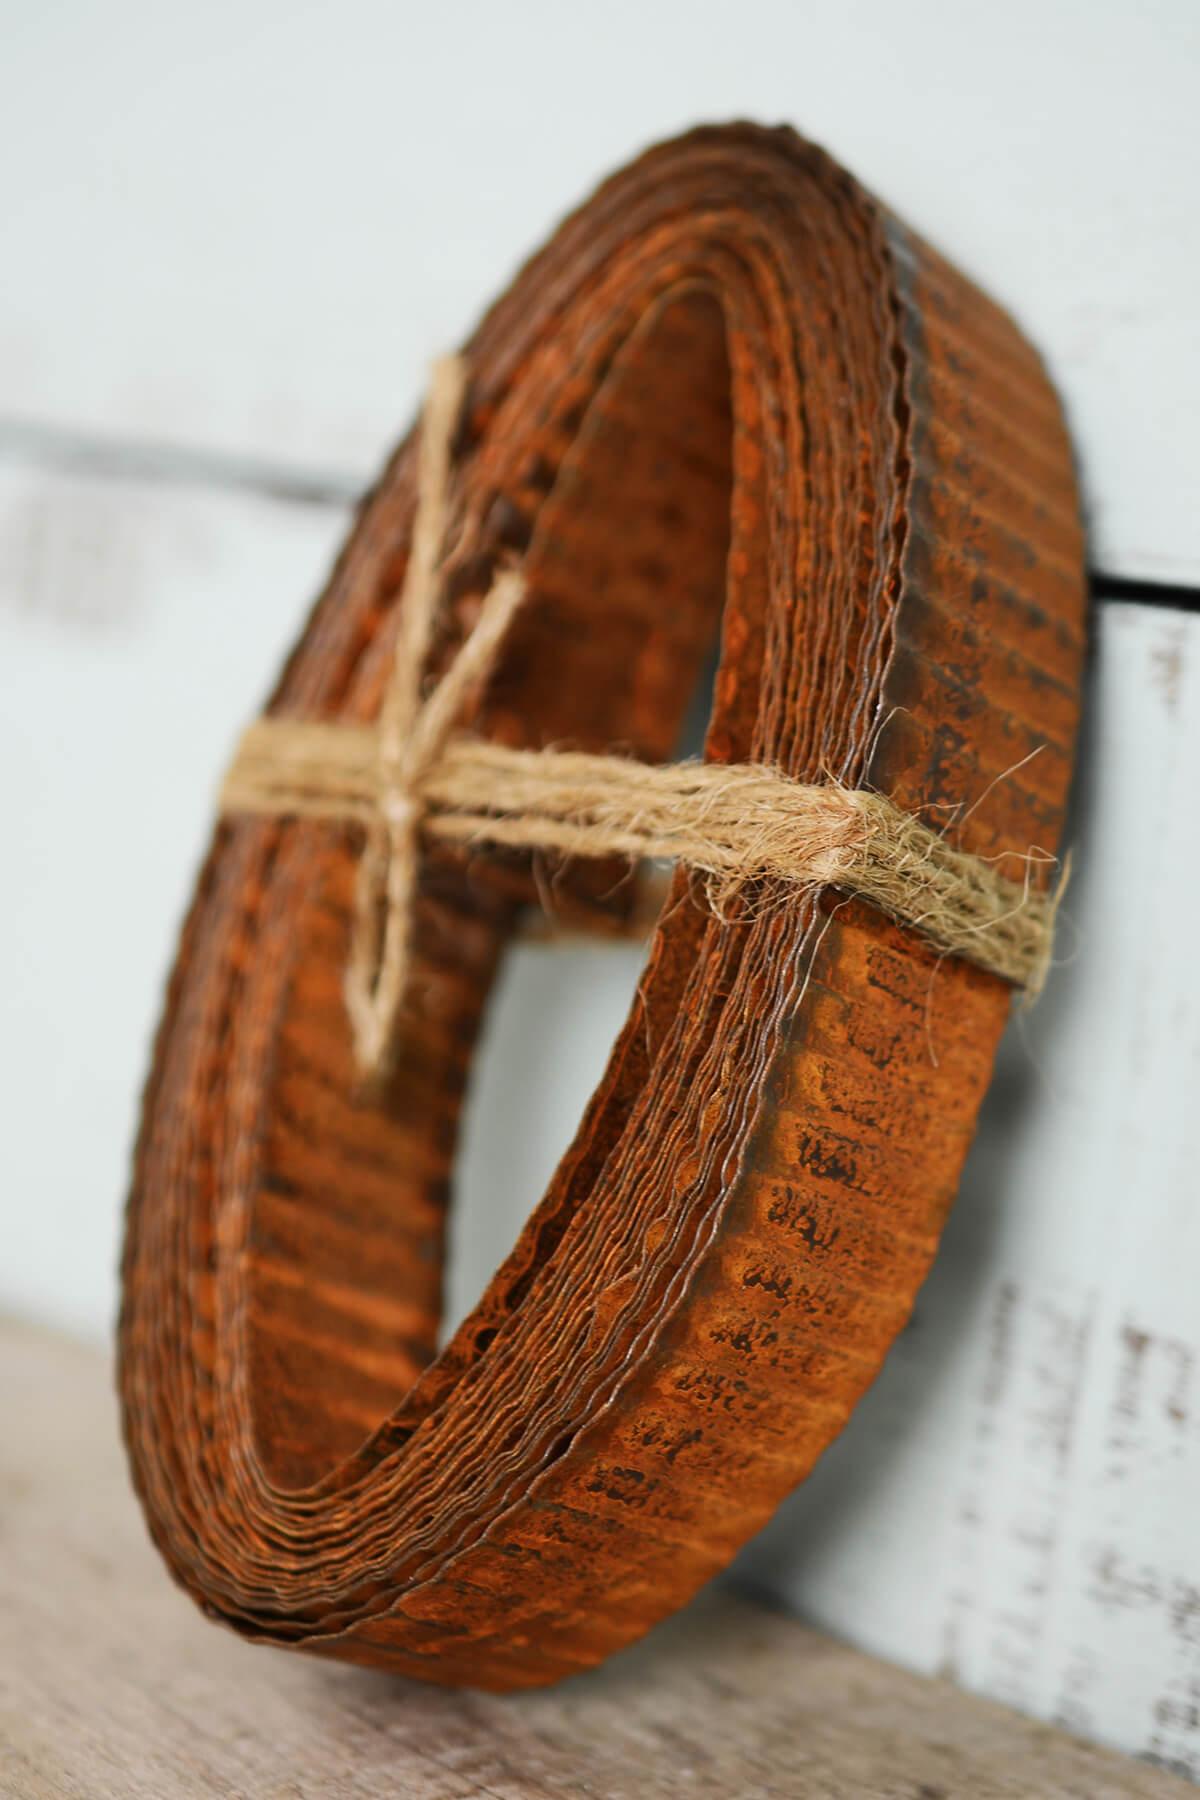
Corrugated Tin Metal Ribbon 1in x 15ft craftseventsribbonfallbowl-floating-candle-holderunique-decor
Quick View
Corrugated Tin Metal Ribbon 1in x 15ft
$17.99
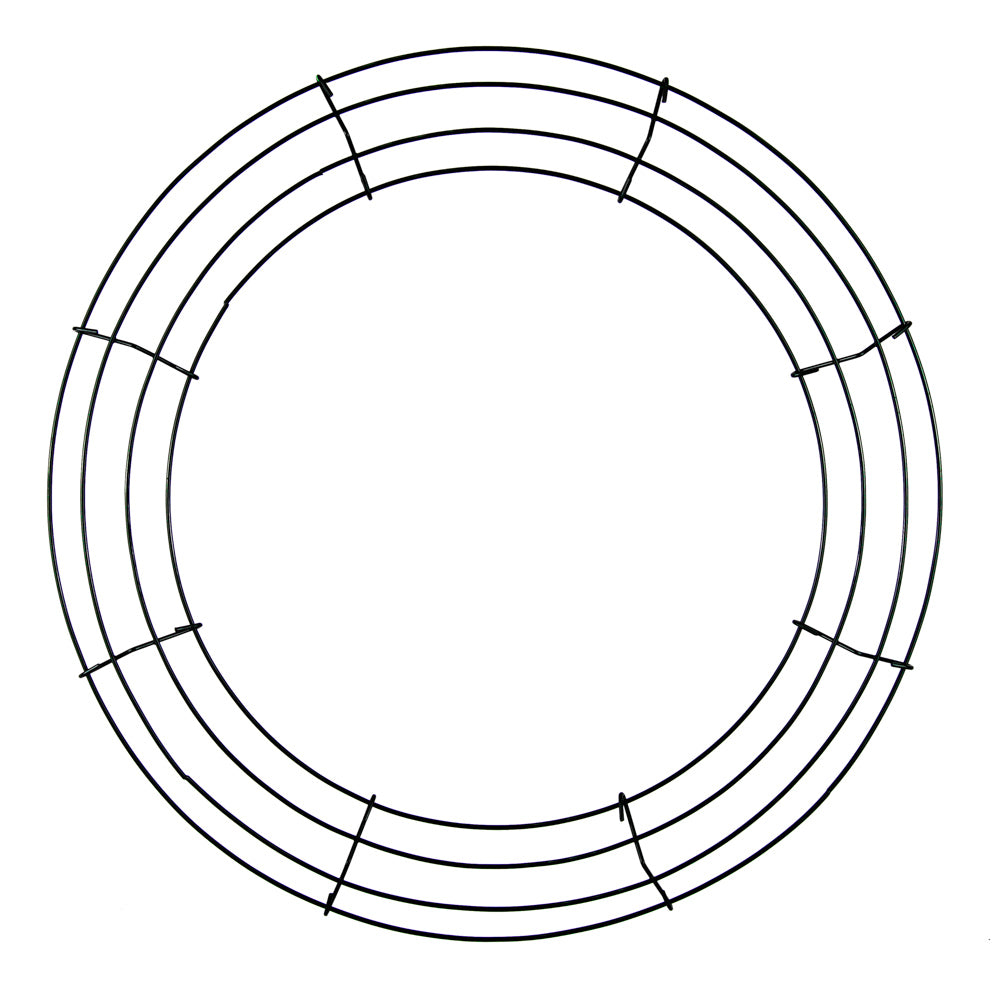
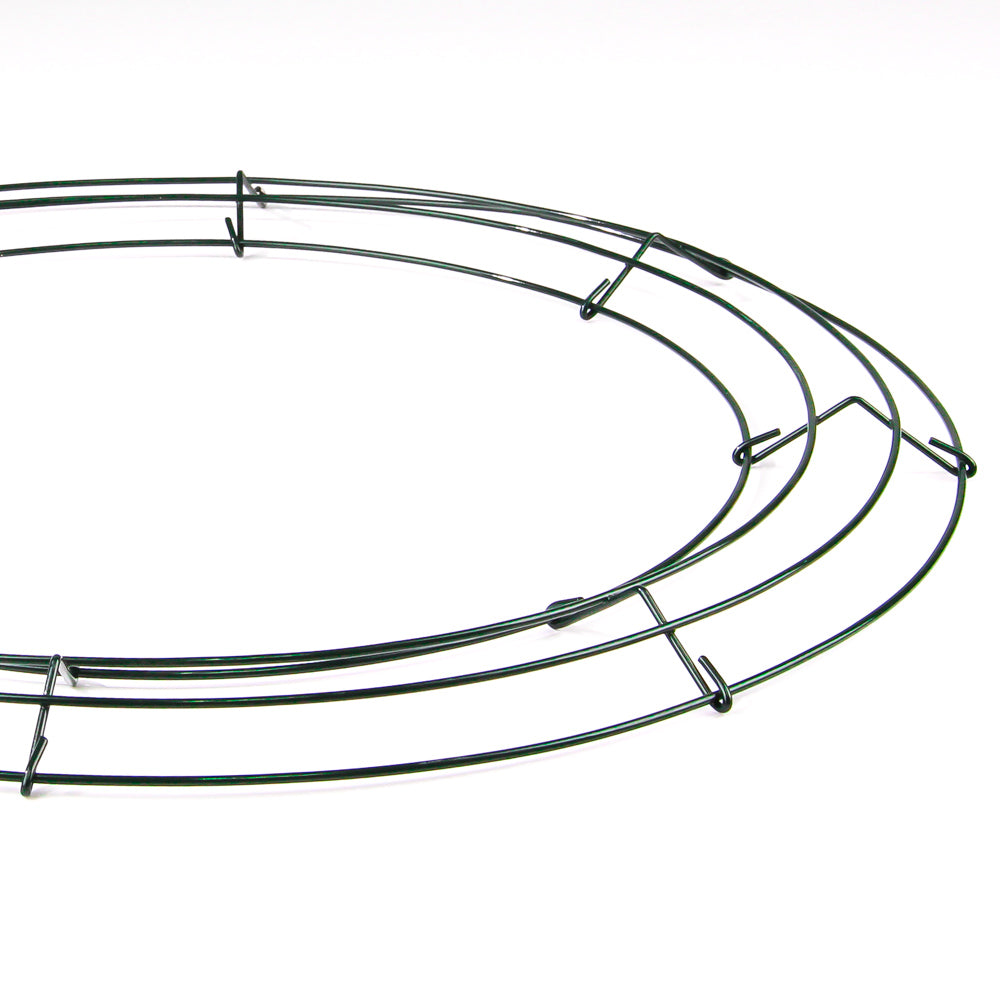
10 Box Wire 16" Wreath Frames christmaschristmas-suppliescraftsbowl-floating-candle-holderfloral-suppliesfloral-wreaths-and-supplieslast-chancesale-group-asale-group-bwreath
Quick View
10 Box Wire 16" Wreath Frames
$23.99
$39.99
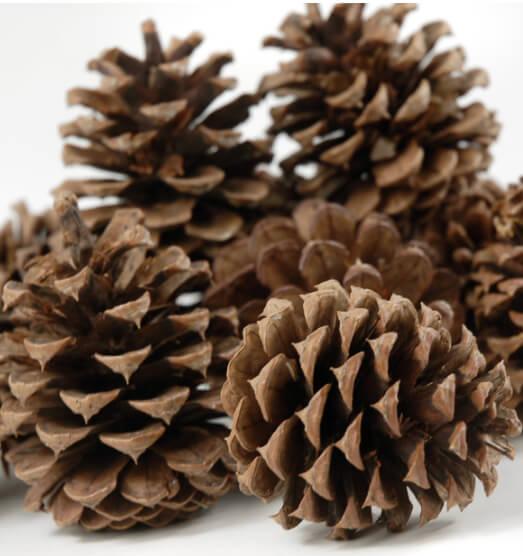
Tiny Hemlock Pine Cones 3qrts (1000 cones) botanicalsbridal-showerconfetticraftseventsfallbowl-floating-candle-holderfruits-nuts-vegetables-podsnaturals-floralspine-conesvase-filler
Quick View
Tiny Hemlock Pine Cones 3qrts (1000 cones)
$14.99
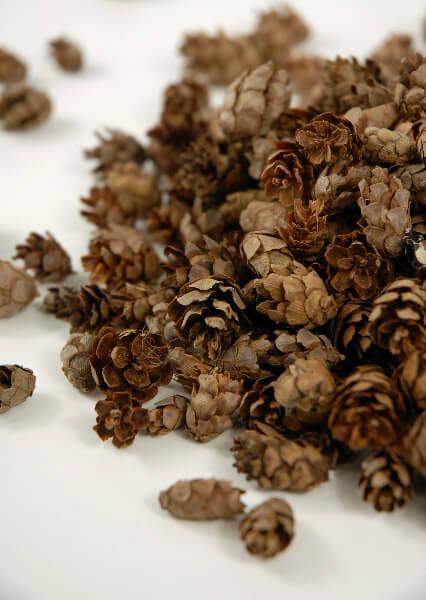
Ponderosa Pine Cones Natural (11-12 cones) botanicalsbridal-showercraftseventsfallbowl-floating-candle-holderfloral-wreaths-and-suppliesfruits-nuts-vegetables-podsnaturals-floralspine-conessale-group-asale-group-e
Quick View
Ponderosa Pine Cones Natural (11-12 cones)
$6.99
$11.99
Vine Wrapped Rustic Wire 40ft corsage-bouttenierecraft-suppliescraftseventsfallbowl-floating-candle-holderfloral-suppliesgarden-outdoorgarden-decorgarlandsgreenerytwinewashi-tape-wire
Quick View
Vine Wrapped Rustic Wire 40ft
$11.99
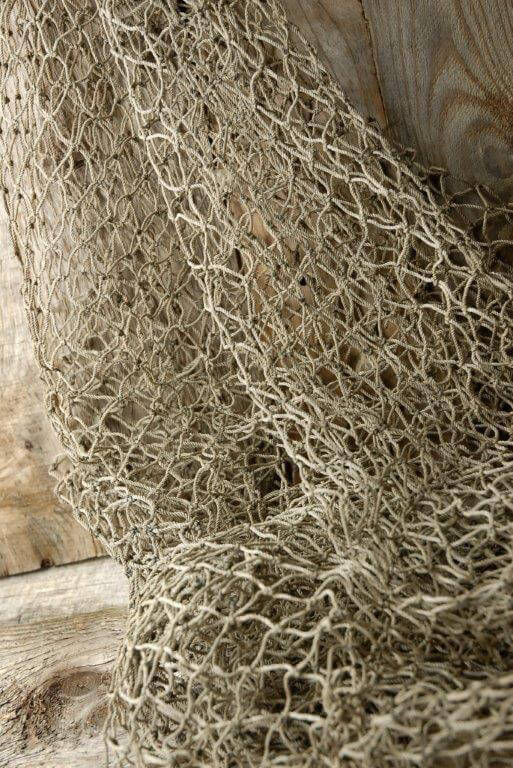
Genuine Fish Net 5x7 birthday-party-1craftseventsribbonbowl-floating-candle-holdergarden-outdoorgarden-decorhome-indoornautical-decorreceptiontablescape
Quick View
Genuine Fish Net 5x7
$16.99
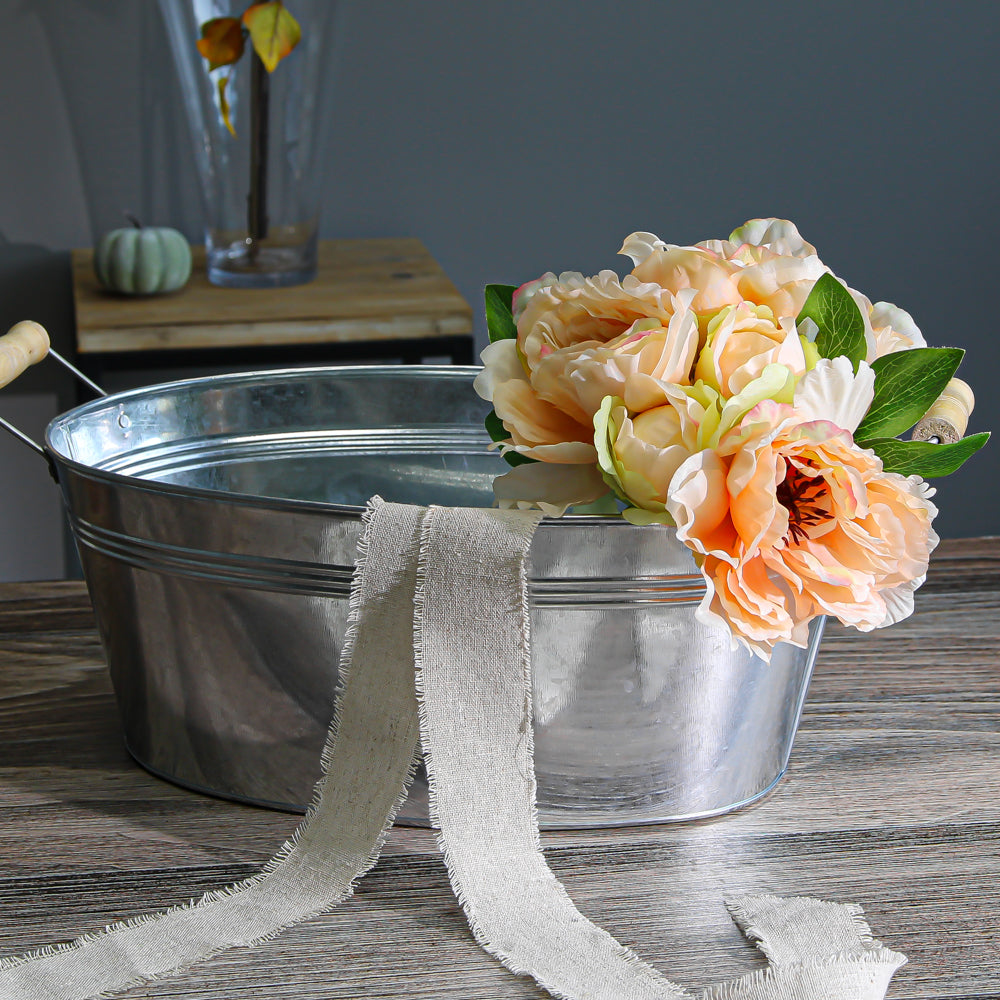
Burlap Table Runner 12.5" x 96" bridal-showerburlapcenterpieceschristmascraftseventsfallbowl-floating-candle-holderfourth-of-julylinensreceptiontablescapethanksgivingweddings
Quick View
Burlap Table Runner 12.5" x 96"
$2.99
$4.99
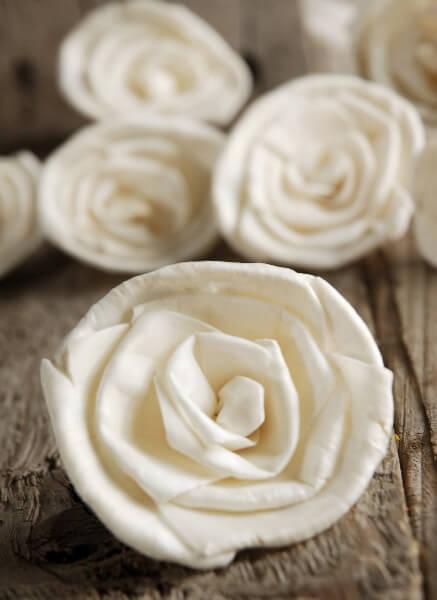
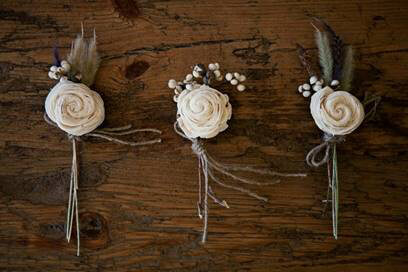
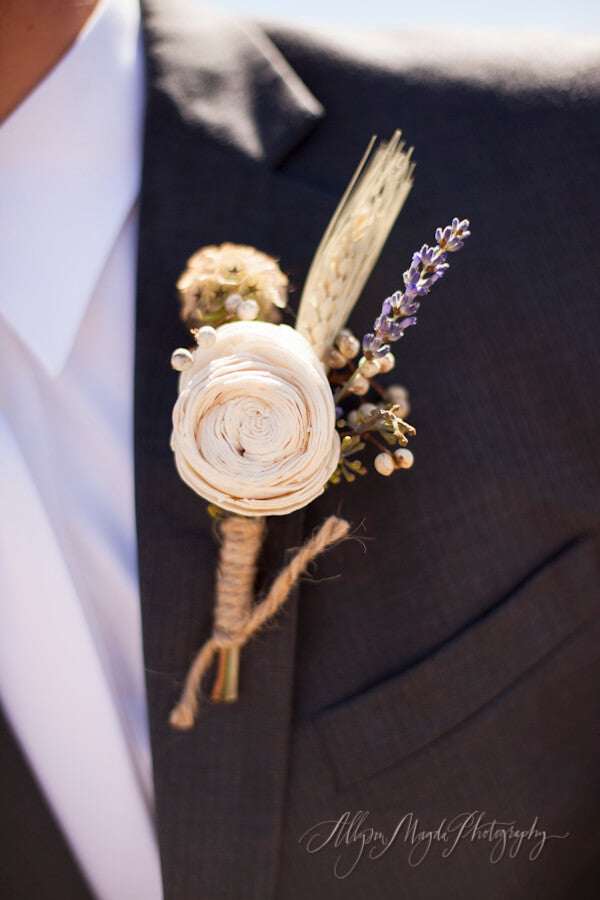
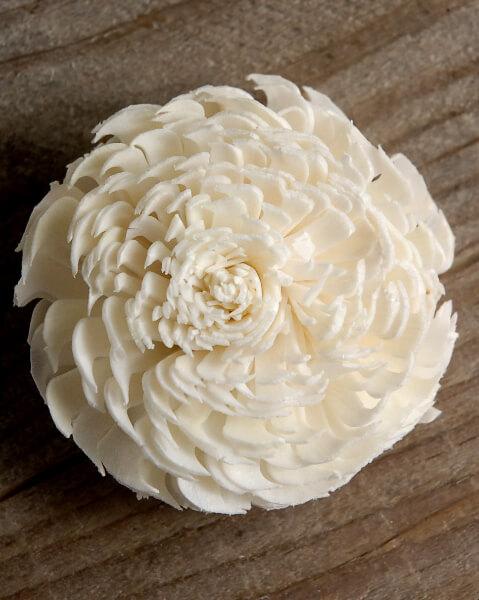
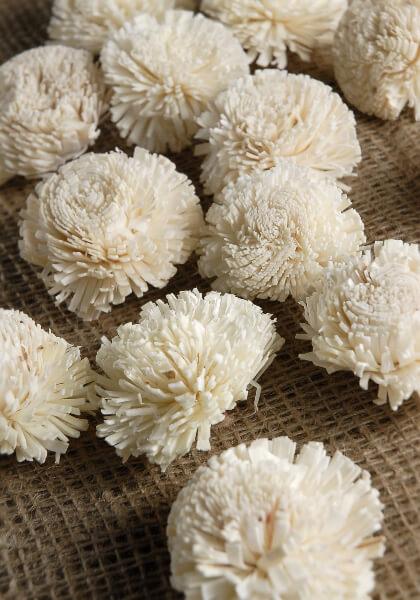
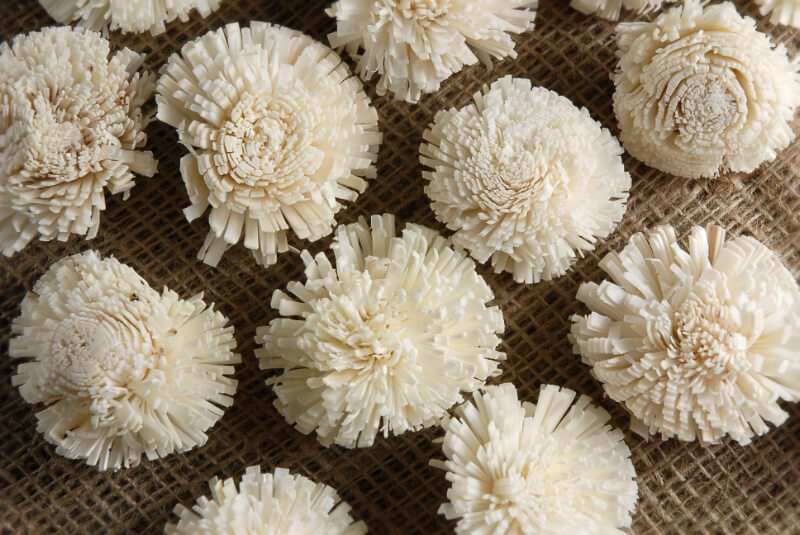
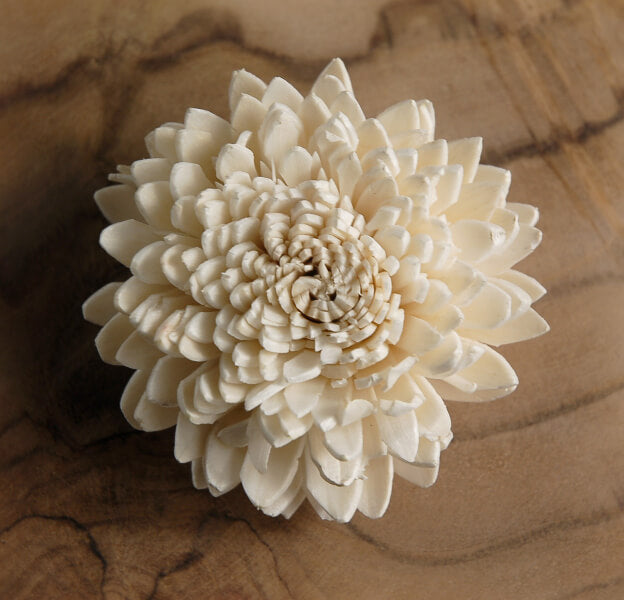
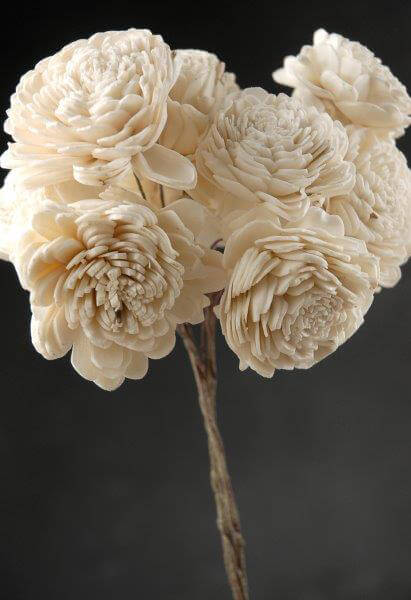
15 Sola Flowers White/Cream Roses botanicalsbouquet-suppliesbridal-showerconfetticorsage-bouttenierecraftsbowl-floating-candle-holderfloral-suppliesfloral-wreaths-and-suppliesflowersnaturals-floralssale-group-avalentines-daywood-crafts
Quick View
15 Sola Flowers White/Cream Roses
$5.99
$9.99
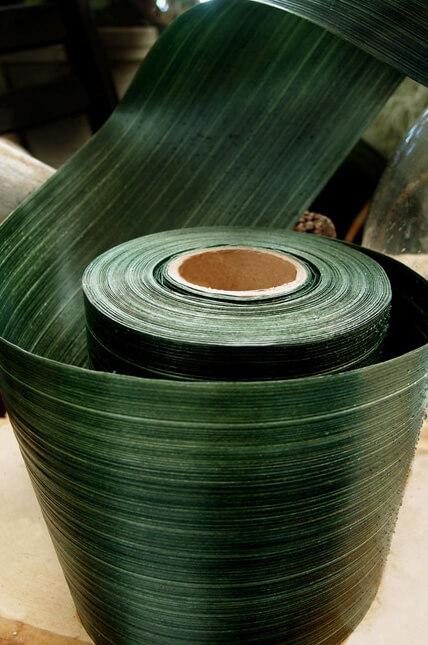
Variegated Aspidistra Leaf Floral Ribbon 4in x 50yds Dark Green bouquet-suppliescorsage-bouttenierecraftseastereventsribbonbowl-floating-candle-holderfloral-suppliesgreenst-patricks-dayunique-decor
Quick View
Variegated Aspidistra Leaf Floral Ribbon 4in x 50yds Dark Green
$19.99
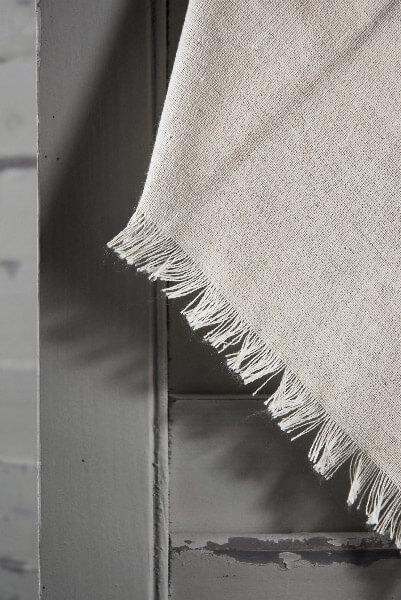
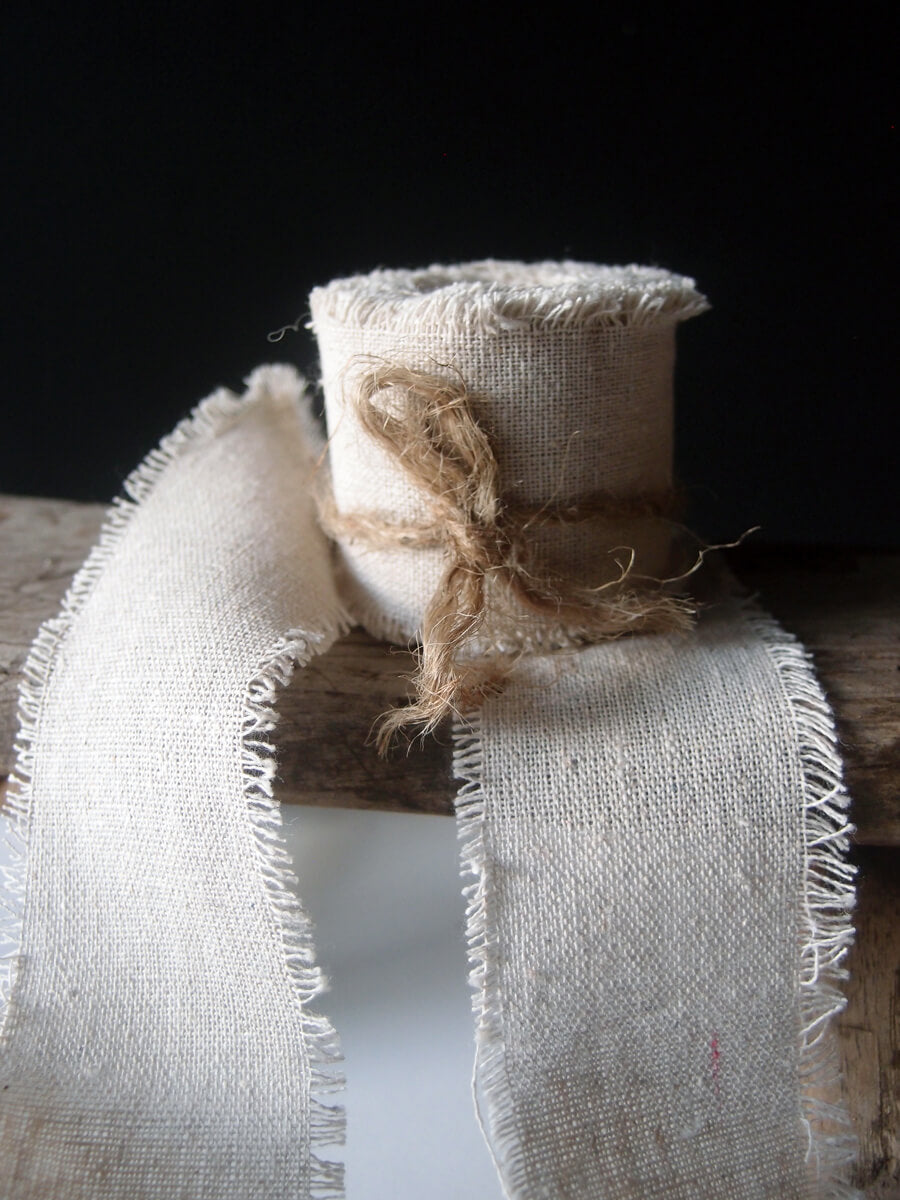
Linen Ribbon w/Fringe Edge 2" wide x 5 yds bouquet-suppliesbridal-showerchristmaschristmas-suppliescraftseventsribbonfallbowl-floating-candle-holderfloral-suppliesunique-decor
Quick View
Linen Ribbon w/Fringe Edge 2" wide x 5 yds
$3.99
12 Linen Napkins with Fringe Edge 20in bridal-showercraftseventsribbonfallbowl-floating-candle-holderlinensreceptiontablescapethanksgiving
Quick View
12 Linen Napkins with Fringe Edge 20in
$24.99
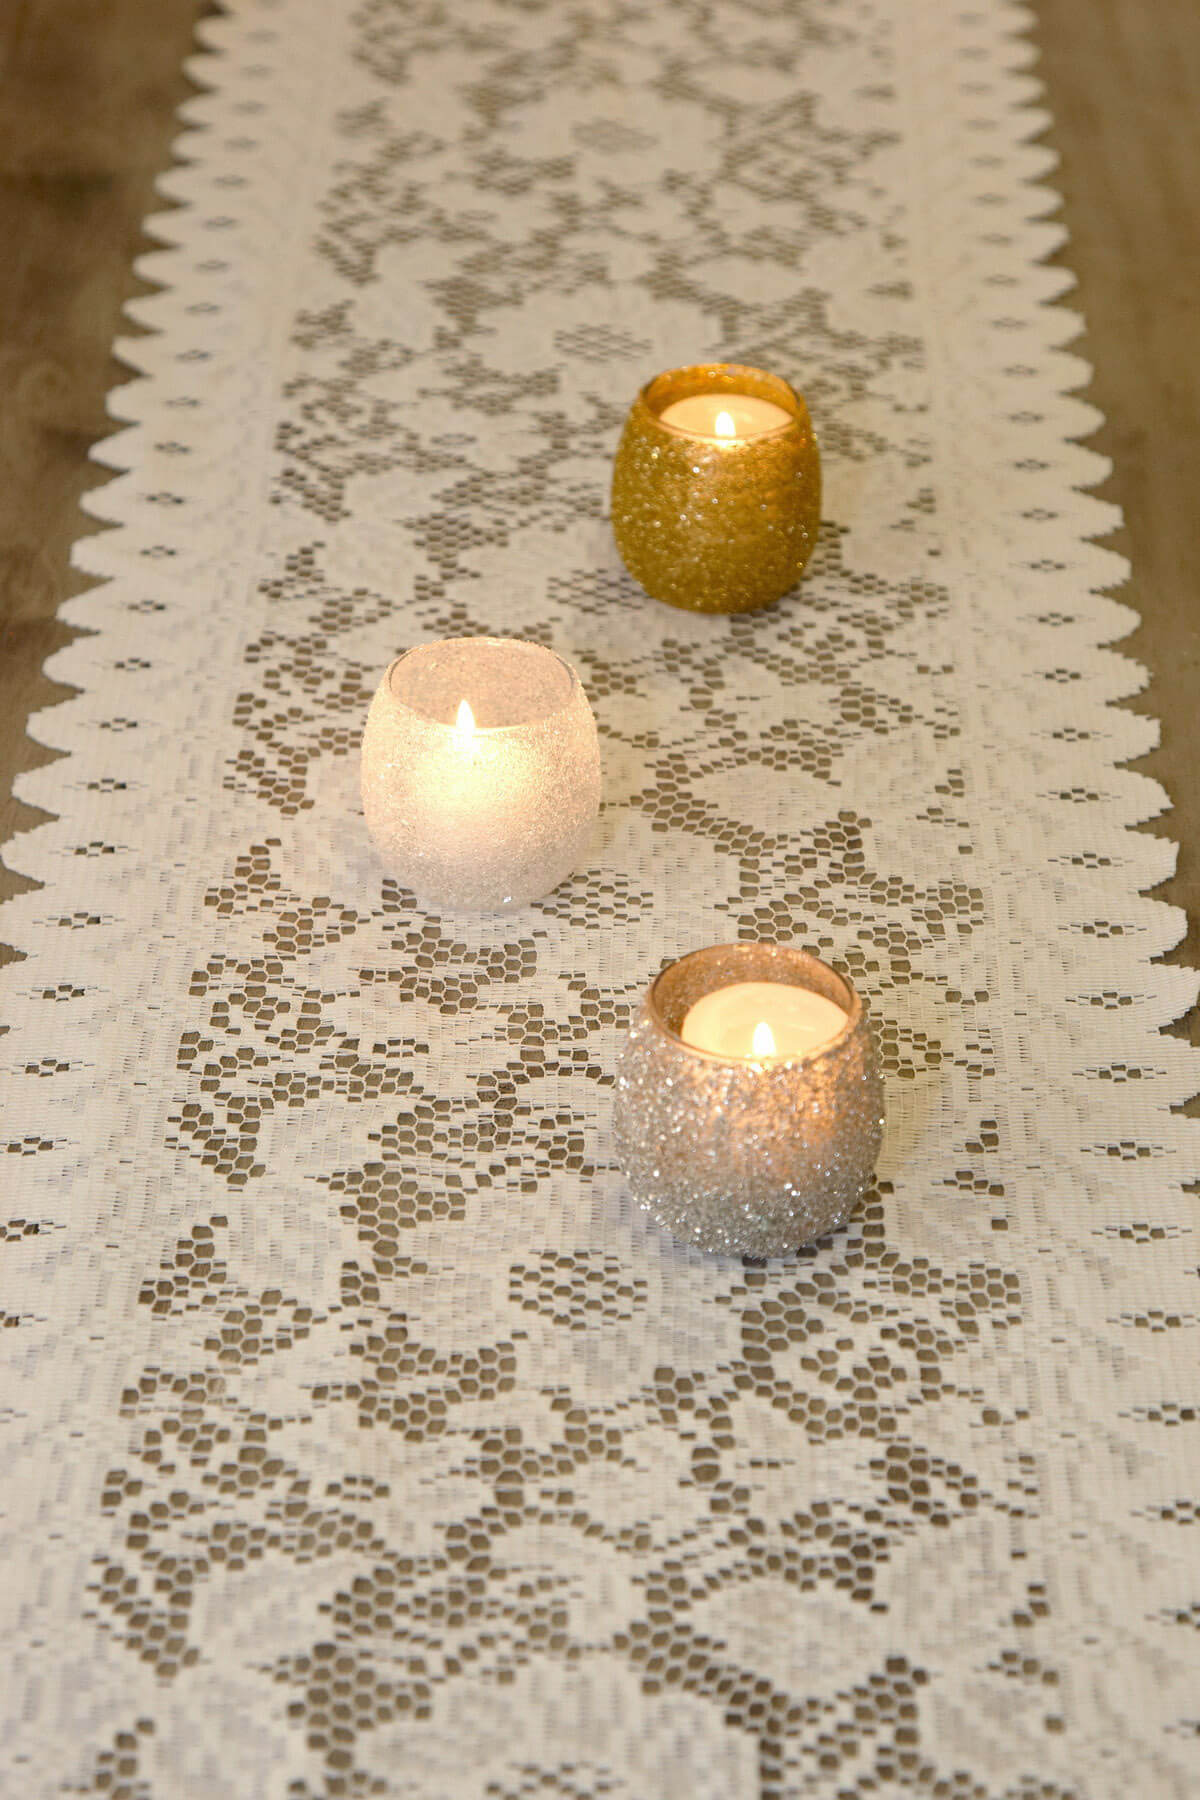
German Glass Glitter Clear 1 lb. bag christmaschristmas-suppliescraft-suppliescraftsbowl-floating-candle-holderglitternautical-decorwinter
Quick View
German Glass Glitter Clear 1 lb. bag
$11.99
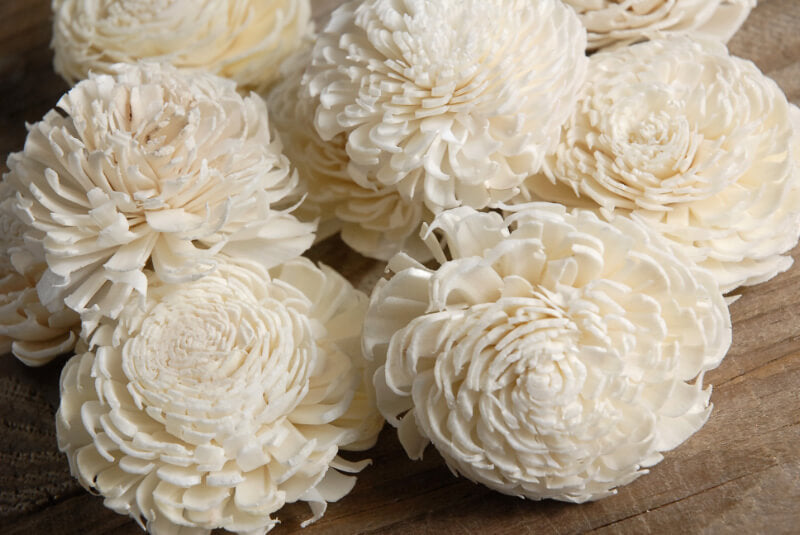
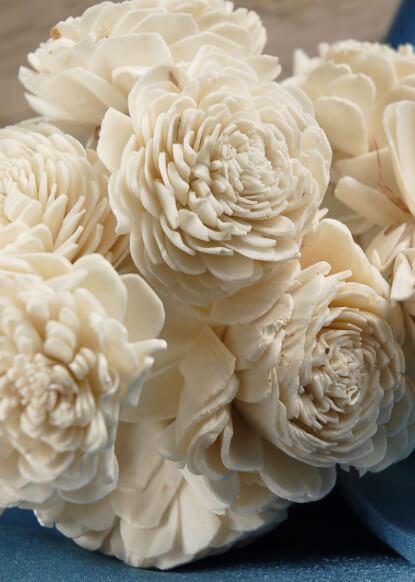
18 Sola Shell Flowers Ivory botanicalsbouquet-suppliesconfetticorsage-bouttenierecraftsbowl-floating-candle-holderfloral-suppliesfloral-wreaths-and-suppliesfloral-saleflowersnaturals-floralssale-group-asale-group-dwood-crafts
Quick View
18 Sola Shell Flowers Ivory
$5.99
$9.99
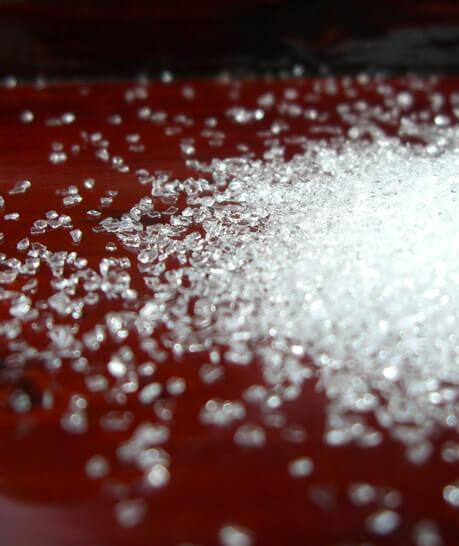
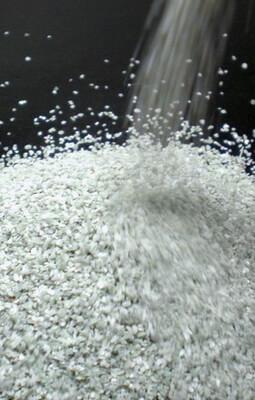
Natural White Sand 2 lb bag birthday-party-1craftsbowl-floating-candle-holderfourth-of-julygarden-outdoorgarden-decornautical-decorvase-filler
Quick View
Natural White Sand 2 lb bag
$5.99
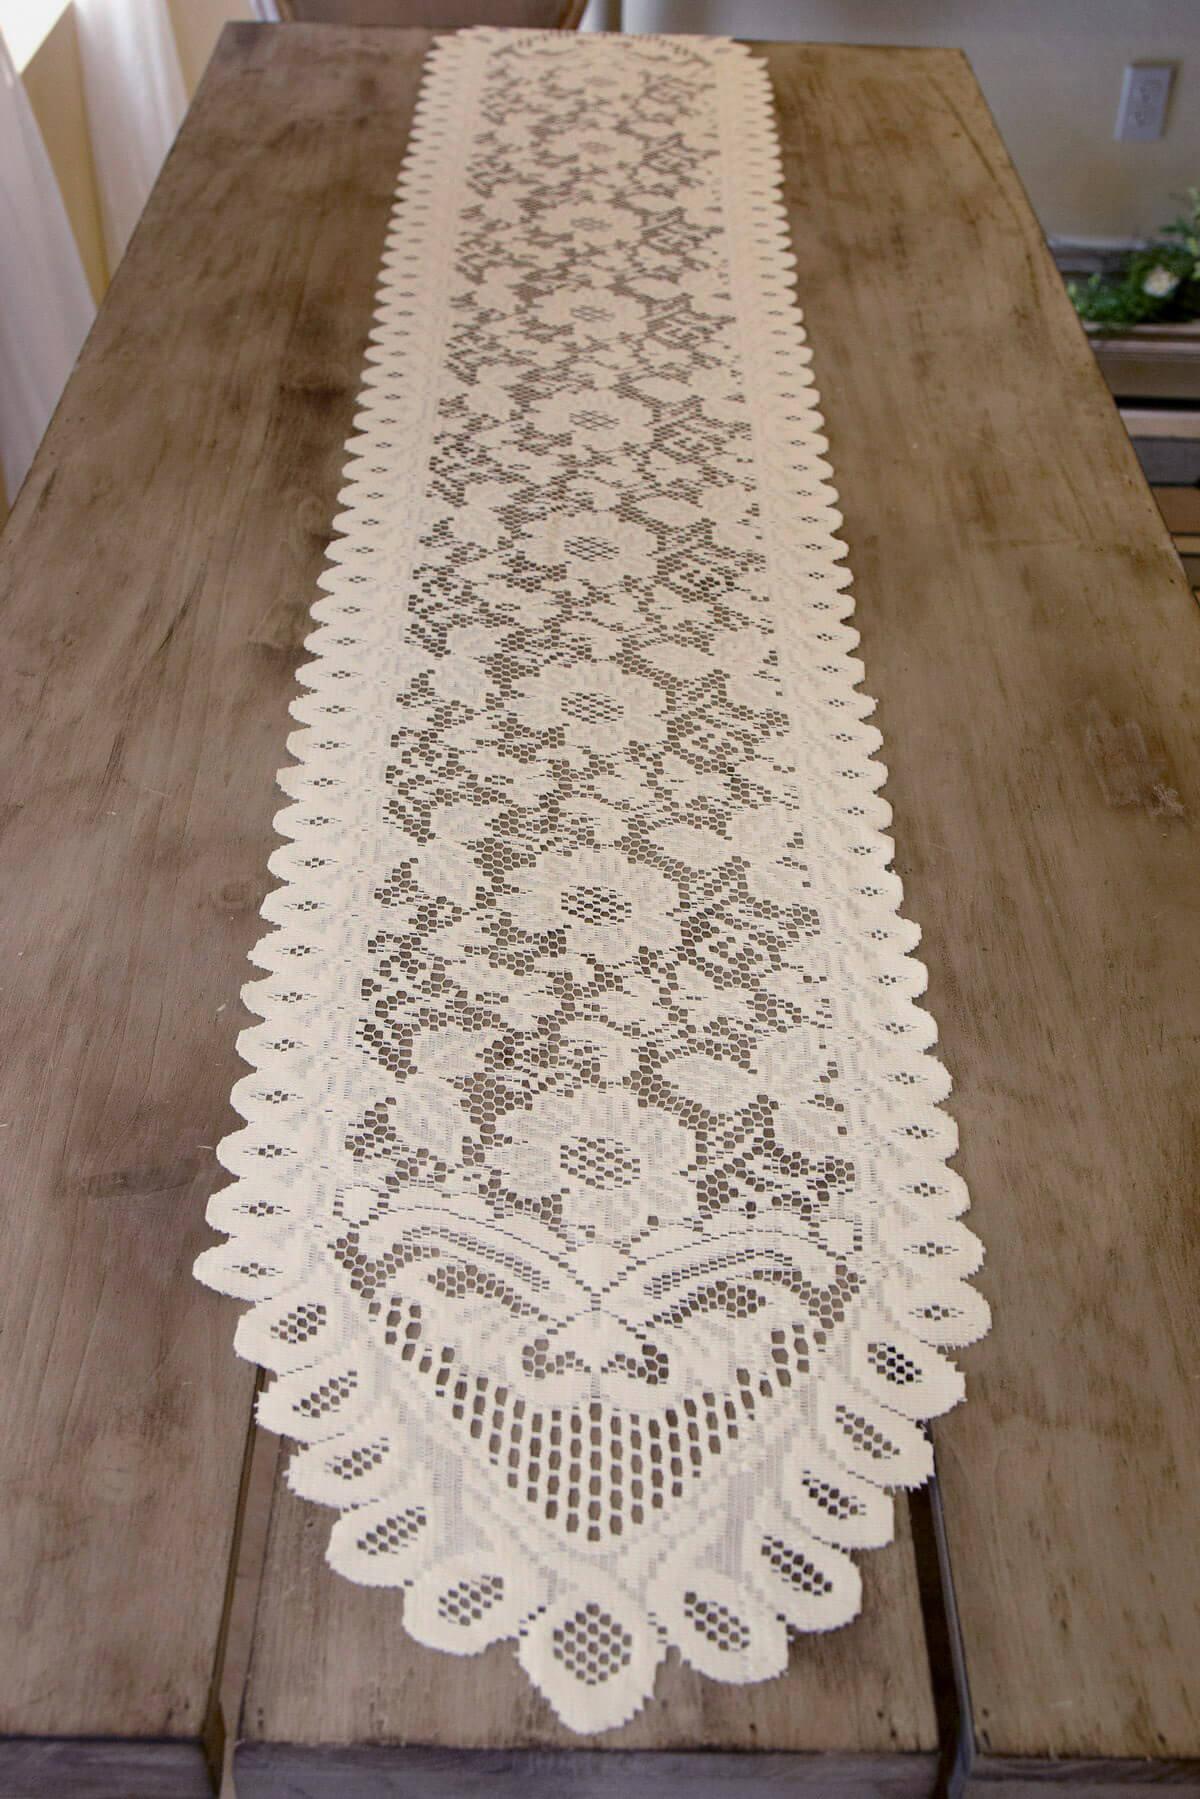
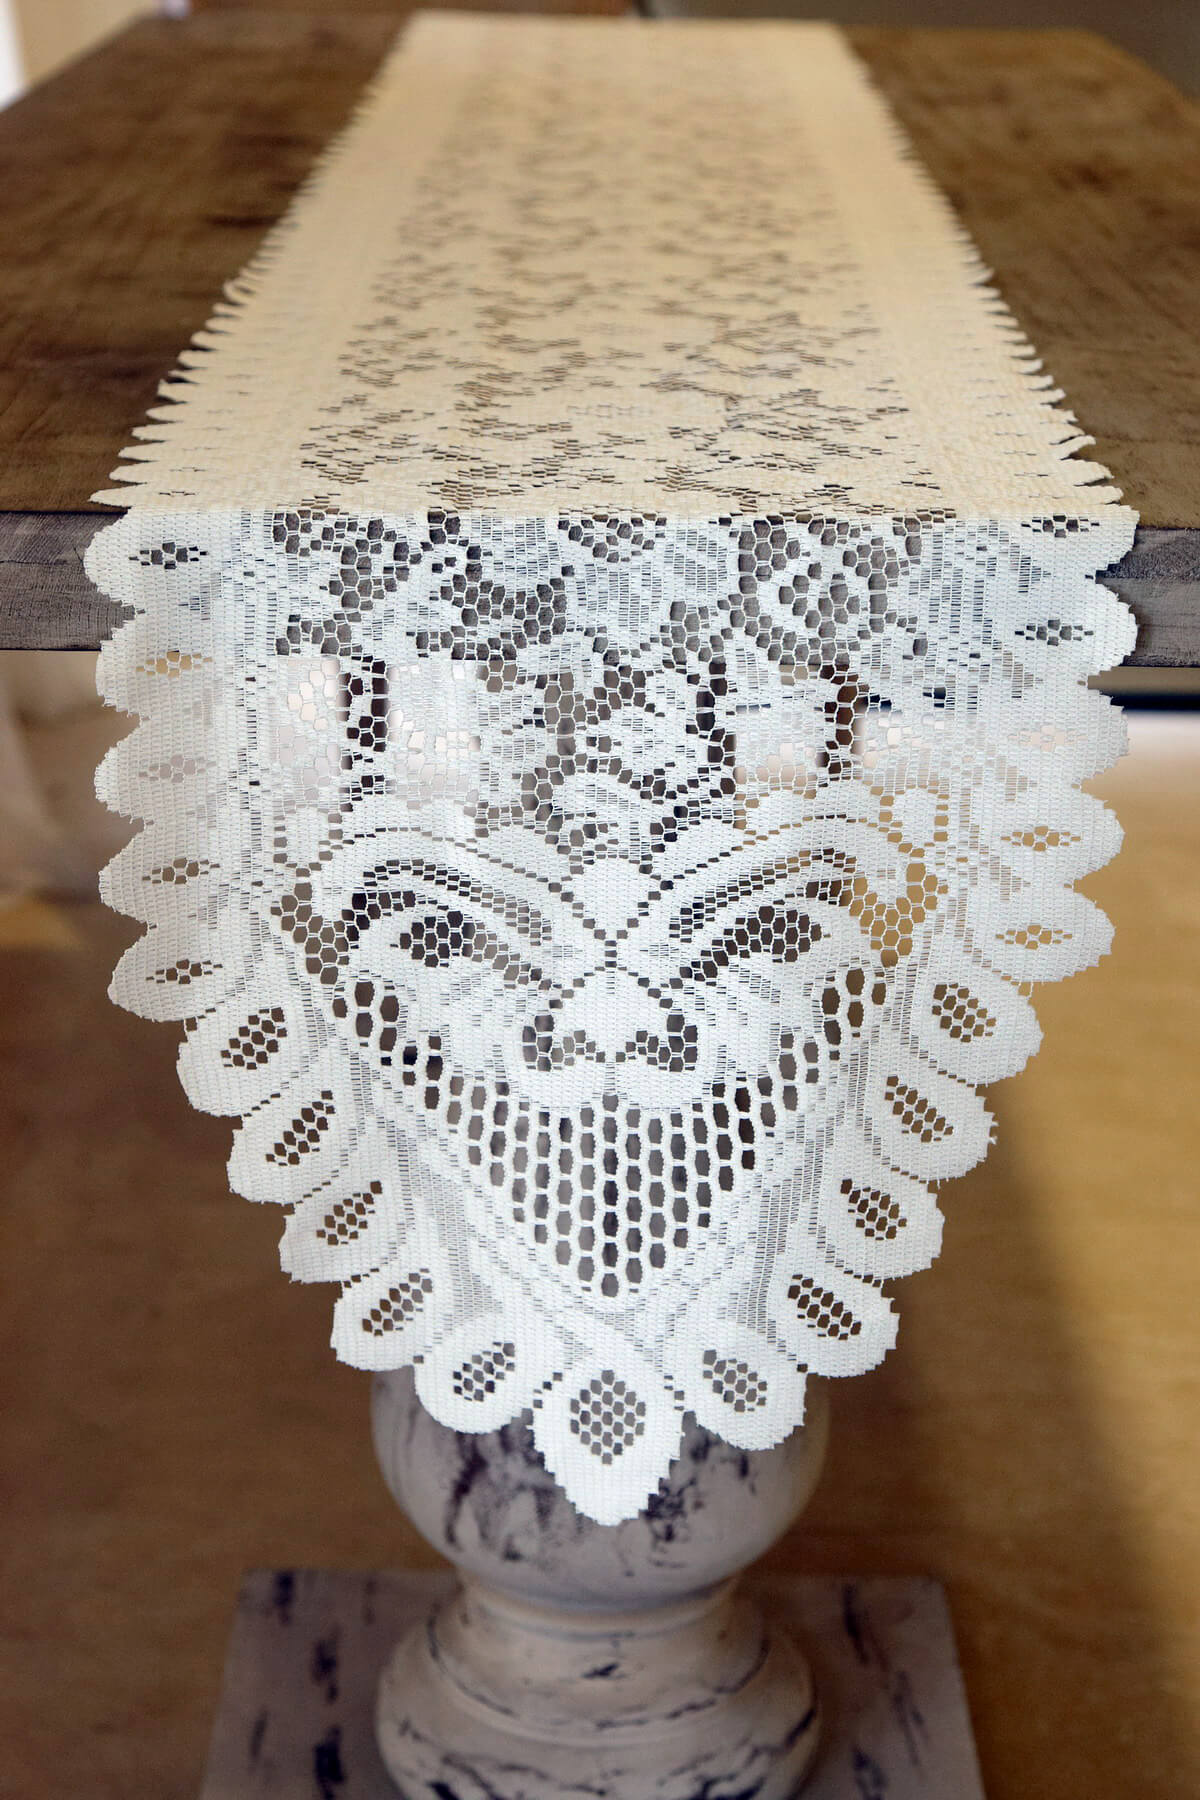
Floral Lace Table Runner & Chair Sash Ivory 13" x 76" anniversarybridal-showercenterpiecescraftsengagement-partyevent-decor-on-salebowl-floating-candle-holderlacelinenspearls-lacereceptiontablescapetabletop-on-saleunique-decorvalentines-dayweddings
Quick View
Floral Lace Table Runner & Chair Sash Ivory 13" x 76"
$5.99
$9.99
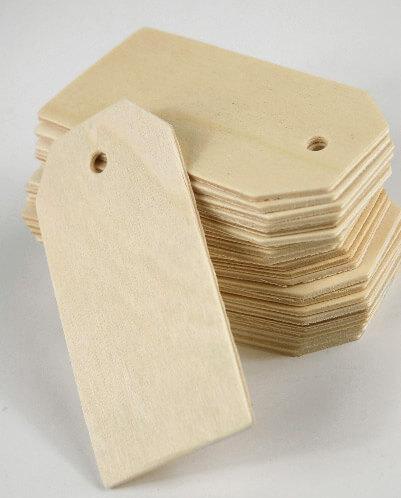
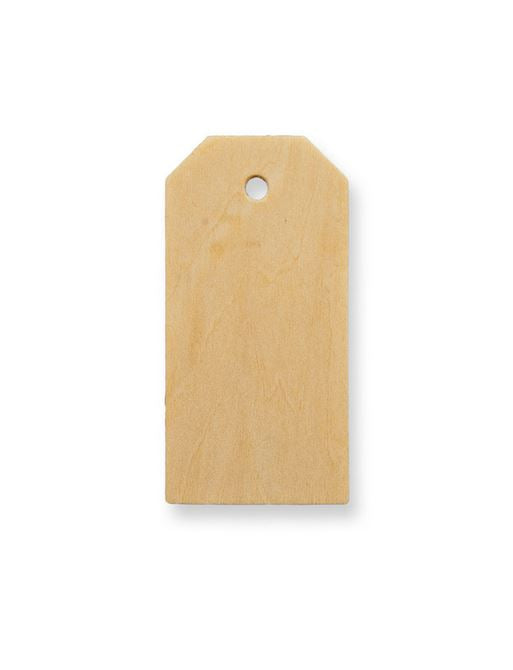
Wood Hang Tags 3.25" Unfinished (Pack of 25) christmaschristmas-suppliescraft-suppliescraftseventsbowl-floating-candle-holdergift-packagingthanksgivingwood-crafts
Quick View
Wood Hang Tags 3.25" Unfinished (Pack of 25)
$13.99
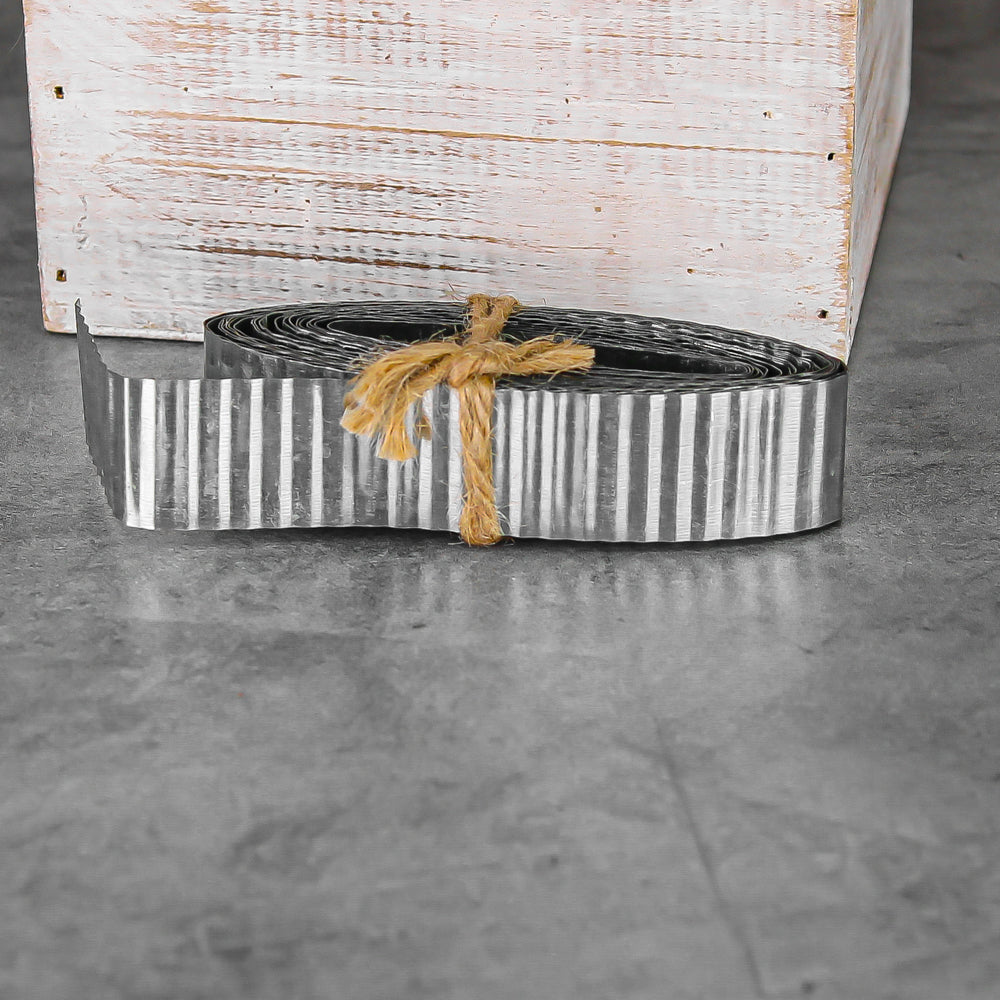
Rusty Corrugated Tin Ribbon 1in 15ft craftseventsribbonfallbowl-floating-candle-holderhalloweenunique-decor
Quick View
Rusty Corrugated Tin Ribbon 1in 15ft
$17.99
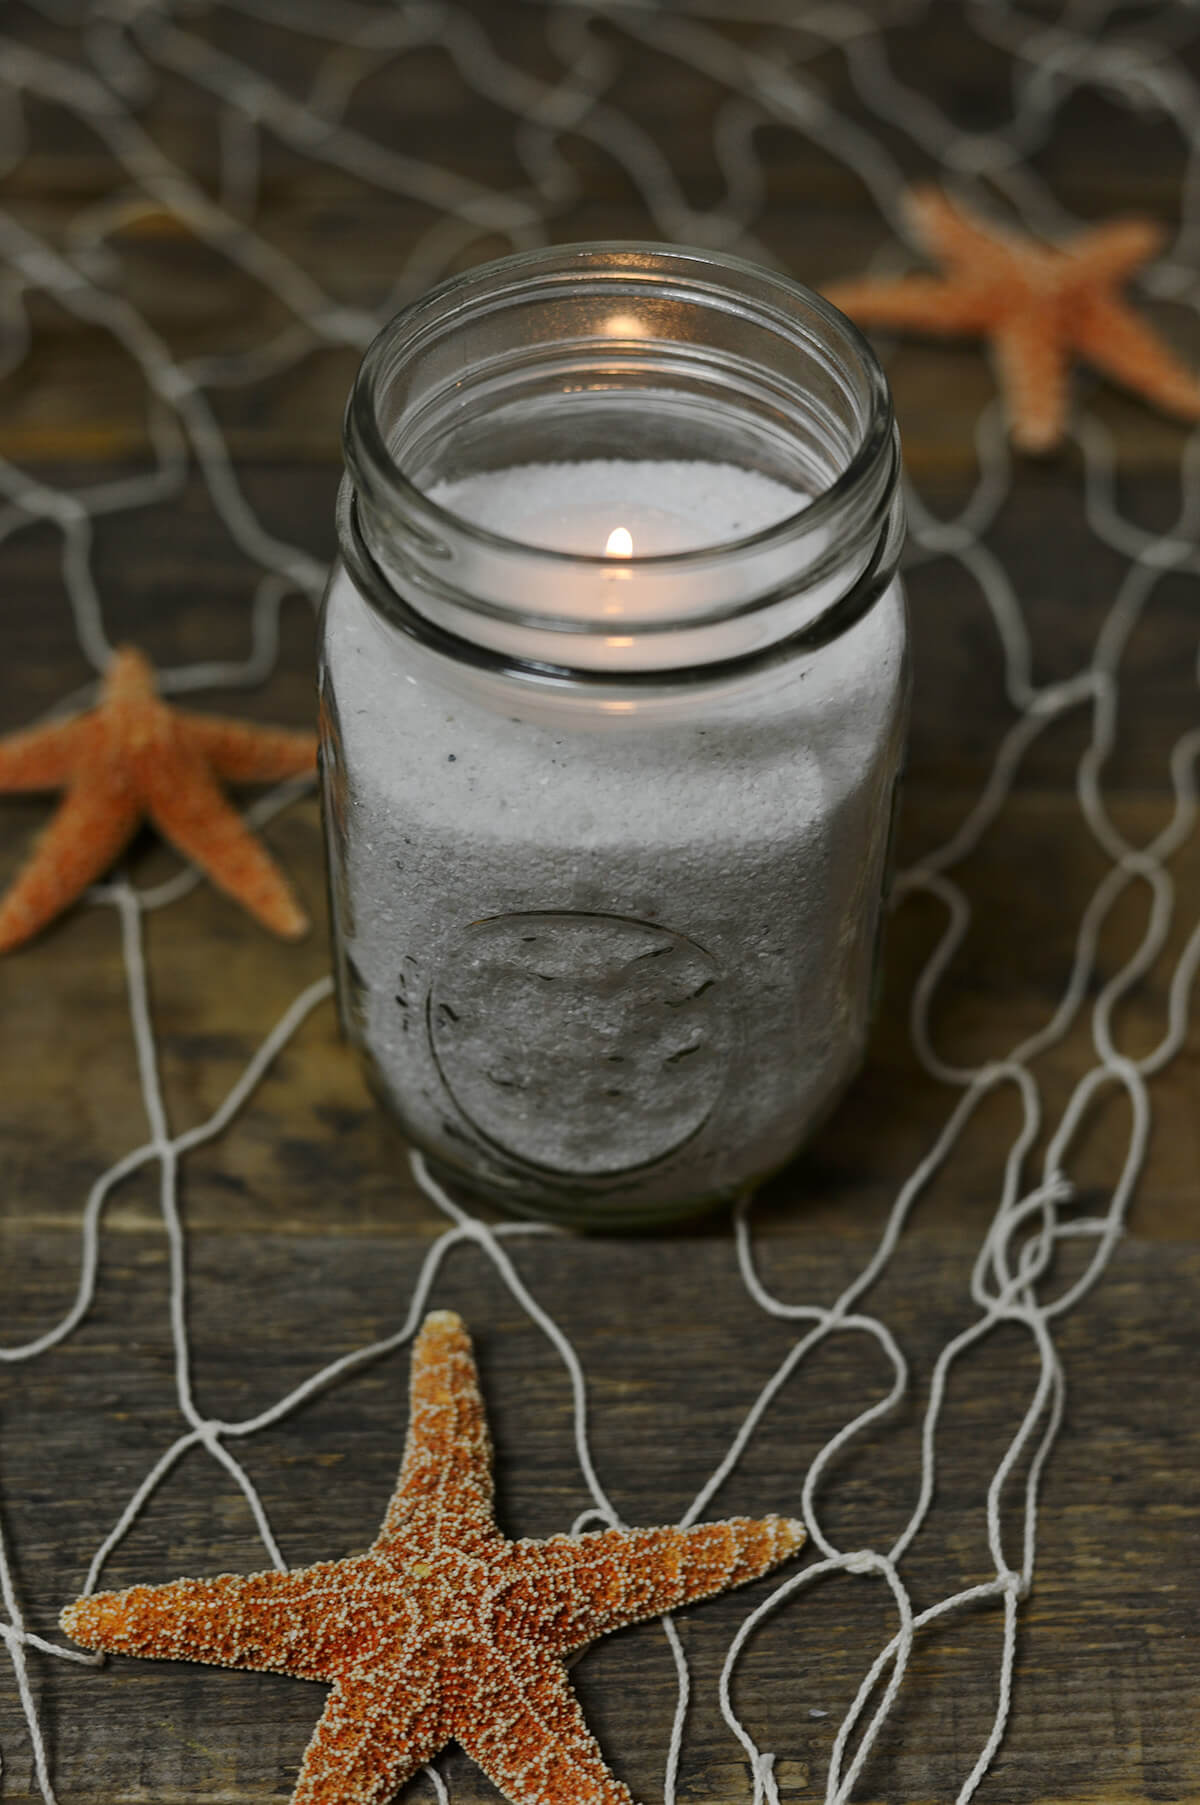
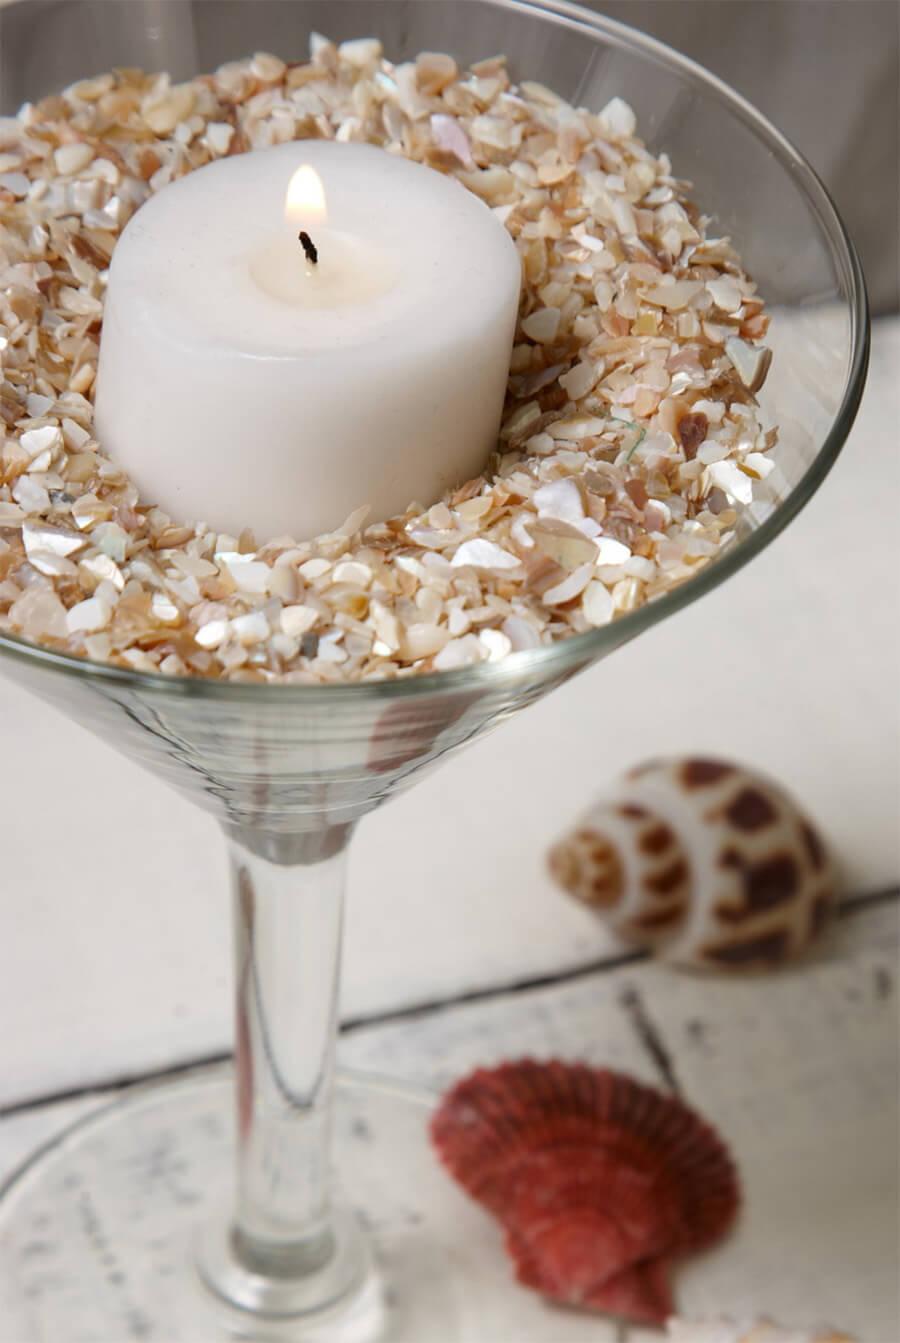
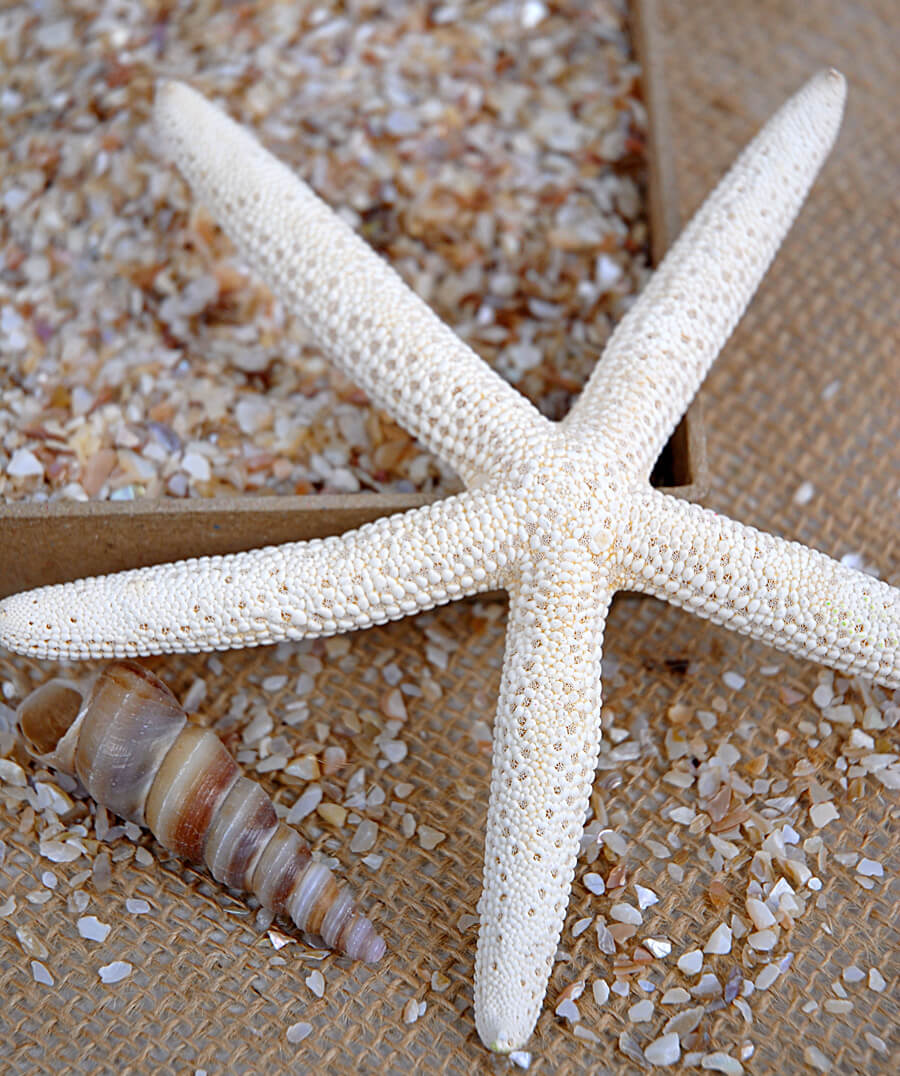
Crushed Fine Natural Shells 1.75 lb birthday-party-1craftsbowl-floating-candle-holdergarden-outdoornautical-decorshellsvase-fillerweddings
Quick View
Crushed Fine Natural Shells 1.75 lb
$5.99
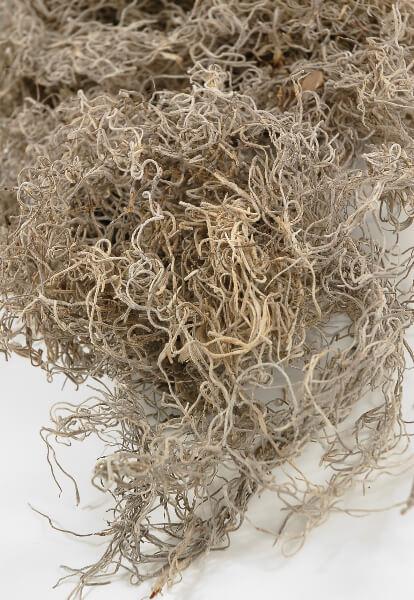
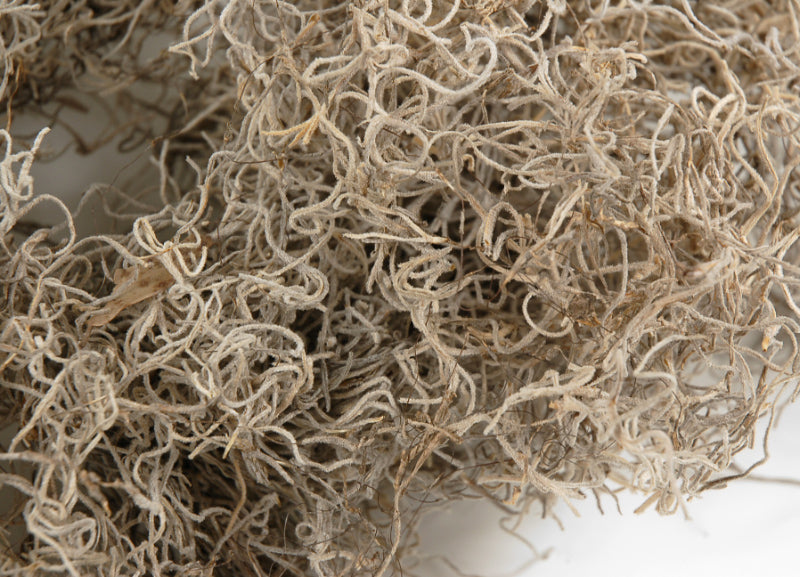
Spanish Moss Natural (125 cubic inches) anniversarybotanicalschristmaschristmas-suppliescraftseasterbowl-floating-candle-holderfloral-suppliesgarden-outdoorgreenhalloweennaturals-floralsst-patricks-daysucculentsterrarium
Quick View
Spanish Moss Natural (125 cubic inches)
$4.99
Burlap Table Runner 12.5" x 120" bridal-showerburlapchristmascraftseventsfallbowl-floating-candle-holderfourth-of-julylinensreceptiontablescapeweddings
Quick View
Burlap Table Runner 12.5" x 120"
$5.99
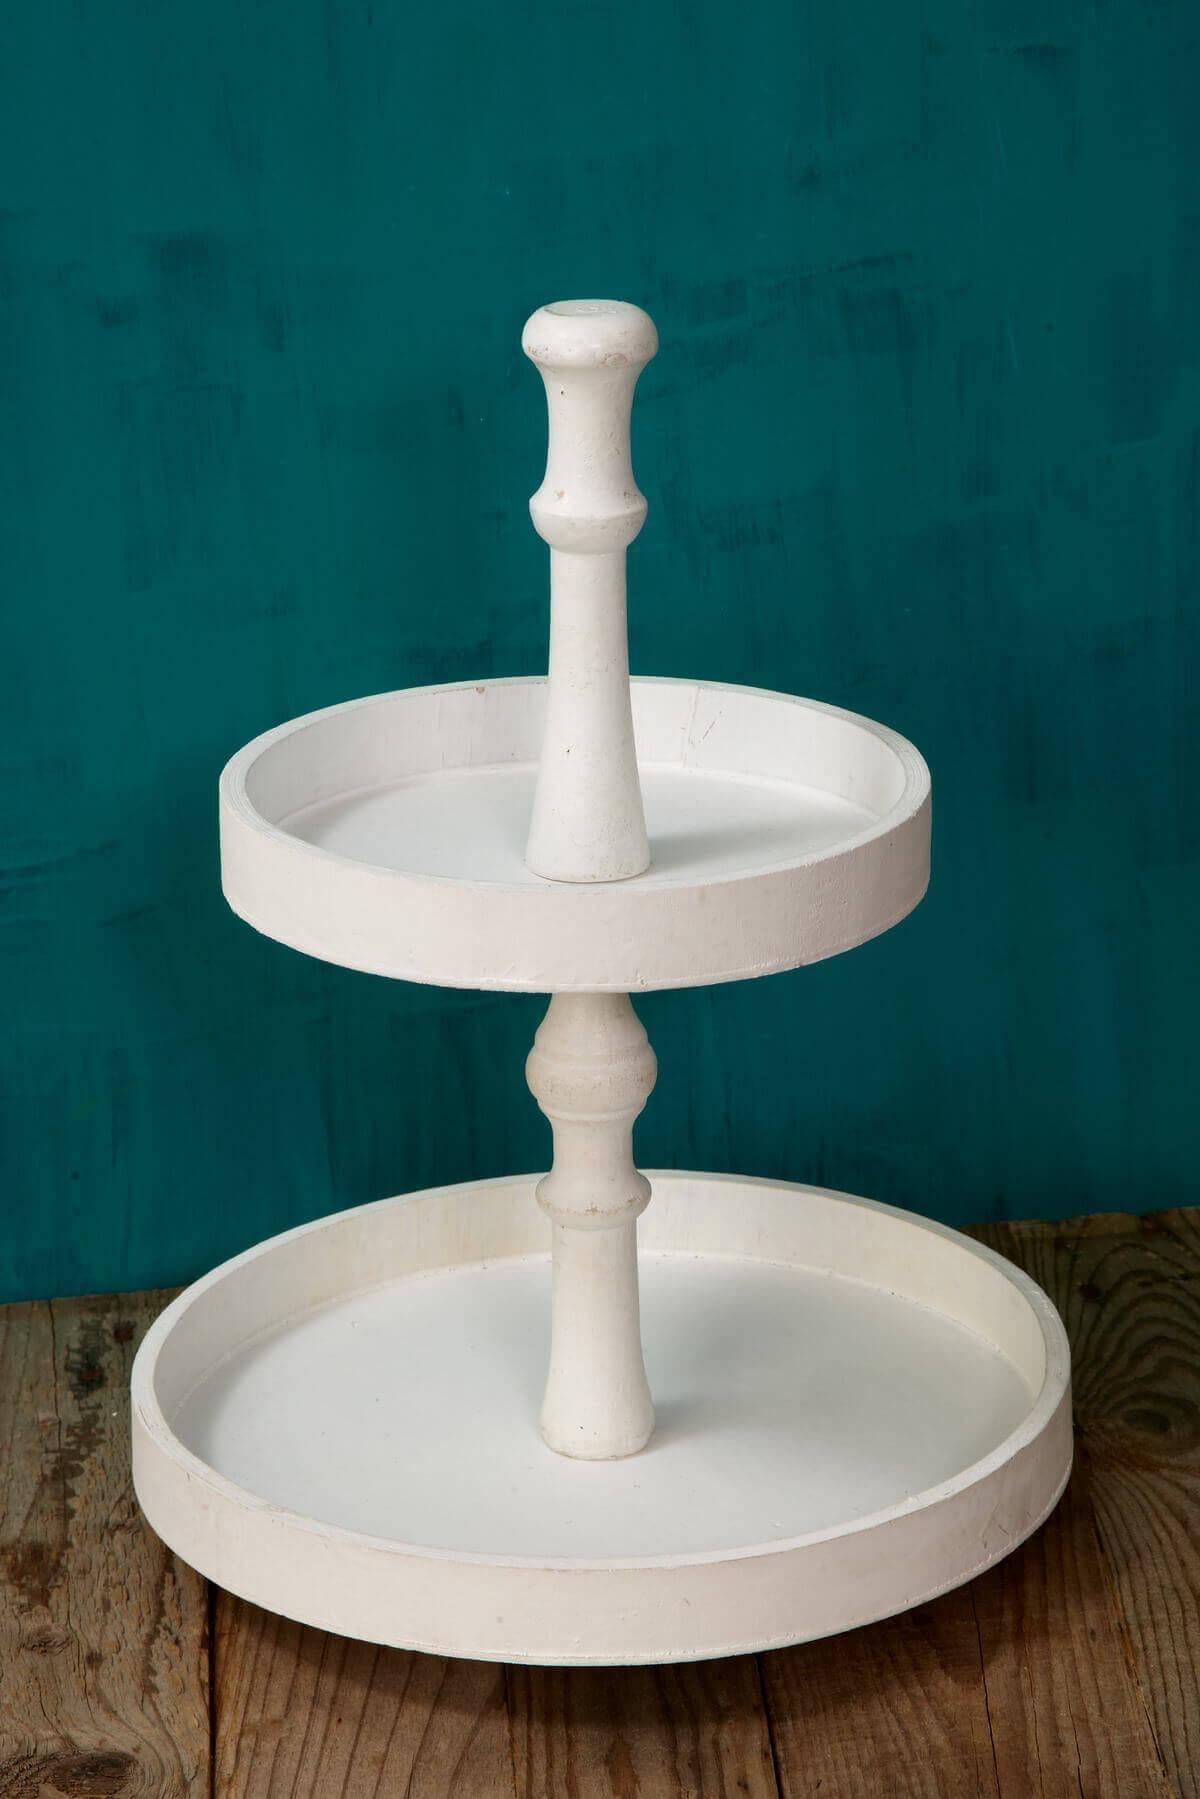
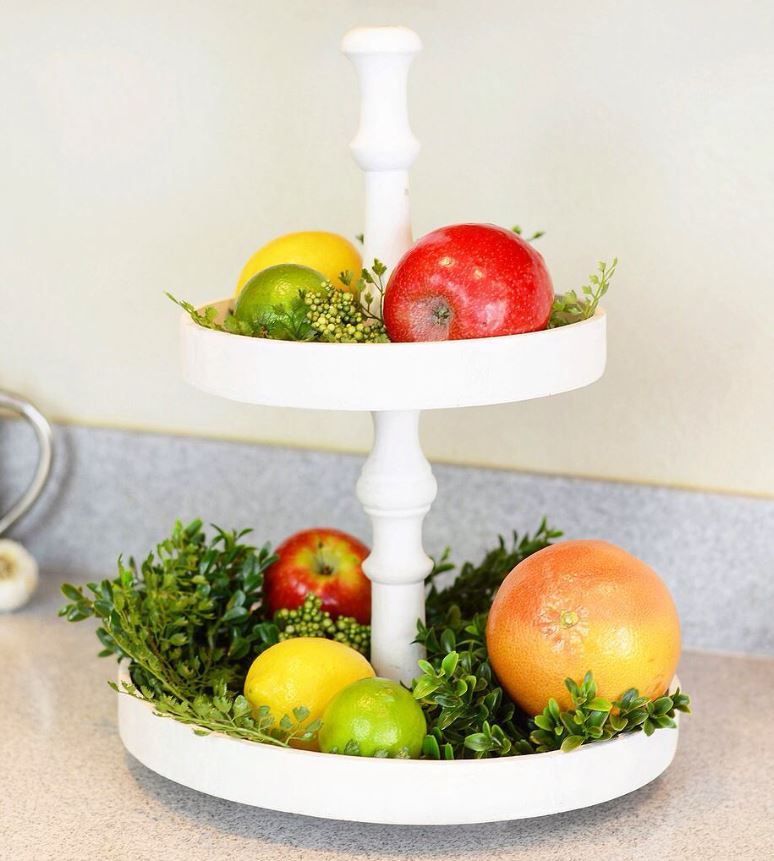
2-Tier Dessert Stand Round 15.5in birthday-party-1bowls-traysbridal-showercake-standscenterpiecescorporate-partiescraftsdecorengagement-partyevent-decor-on-saleeventsbowl-floating-candle-holderfourth-of-julyhome-indoorreceptionsaleservewaretablescapetabletop-on-saleweddings
Quick View
2-Tier Dessert Stand Round 15.5in
$20.99
$34.99
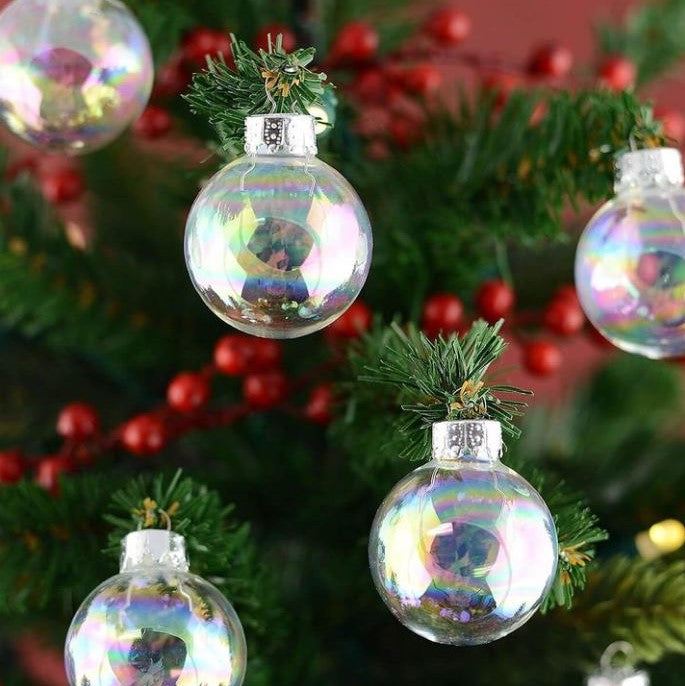
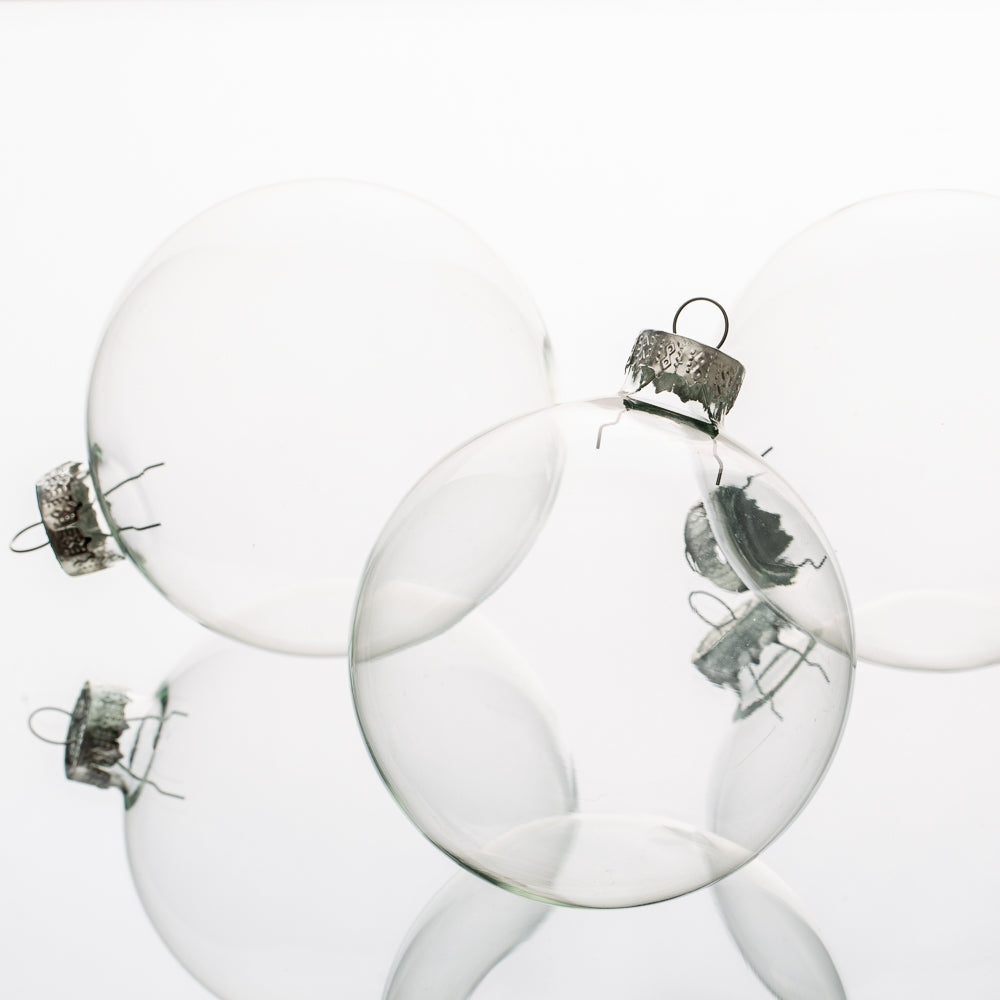
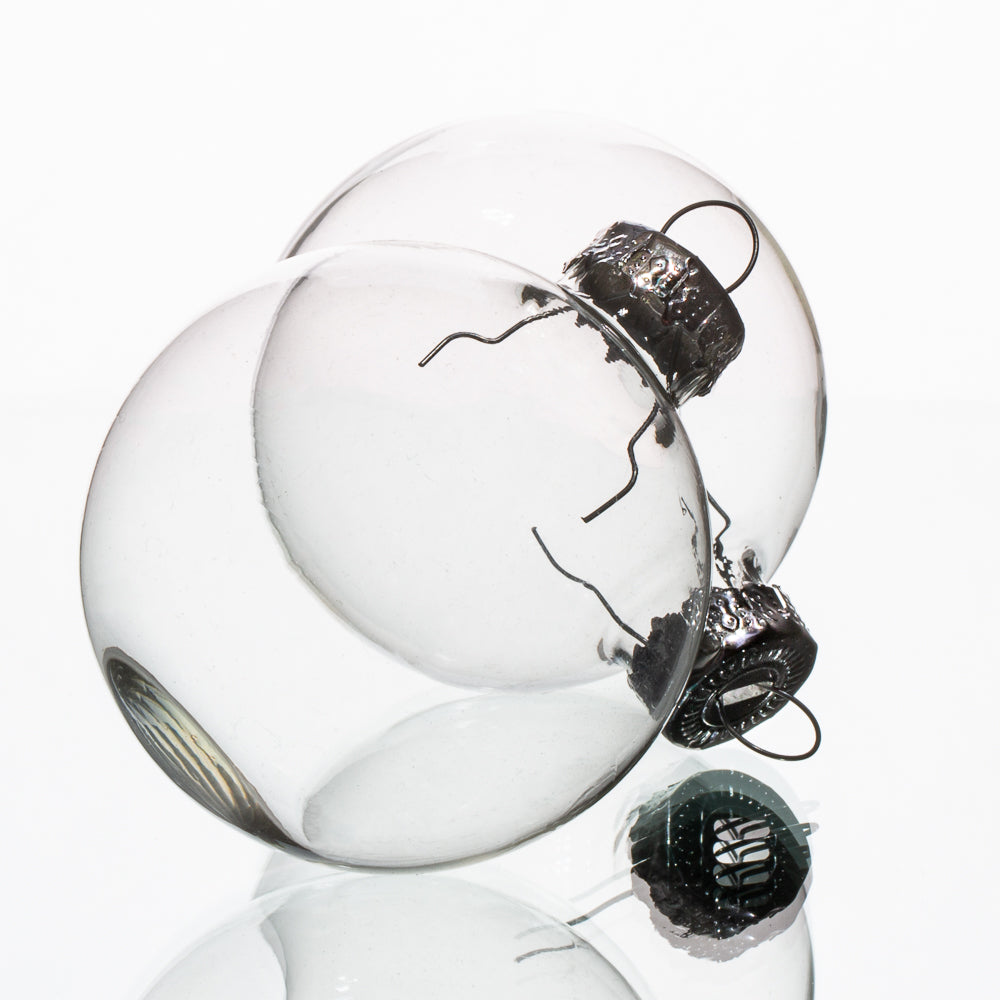
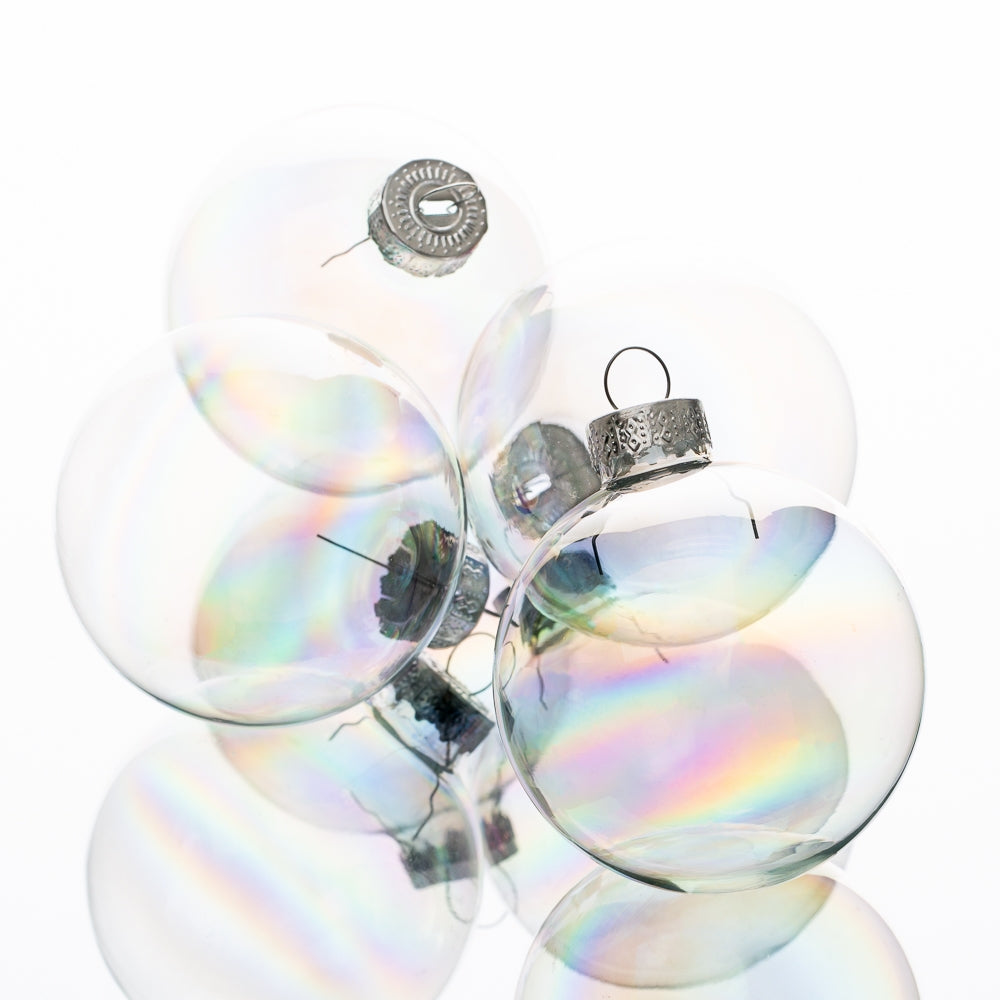
Richland Glass Ornaments 3” Clear Set of 24 christmaschristmas-suppliescraftsbowl-floating-candle-holder
Quick View
Richland Glass Ornaments 3” Clear Set of 24
$14.99
Sold Out
Variegated Aspidistra Leaf Floral Ribbon 4in x 50 yards Green & Cream bouquet-suppliescorsage-bouttenierecraftseastereventsribbonbowl-floating-candle-holderfloral-suppliesgreenst-patricks-dayunique-decor
Quick View
Variegated Aspidistra Leaf Floral Ribbon 4in x 50 yards Green & Cream
$22.99
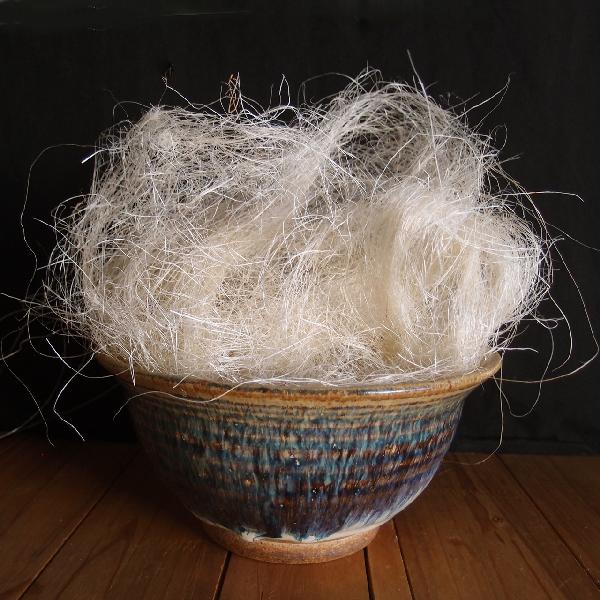
Natural Sisal Fiber Shred (125 grams) botanicalscraftseasterfallbowl-floating-candle-holderfloral-supplieshalloweenvase-filler
Quick View
Natural Sisal Fiber Shred (125 grams)
$7.99
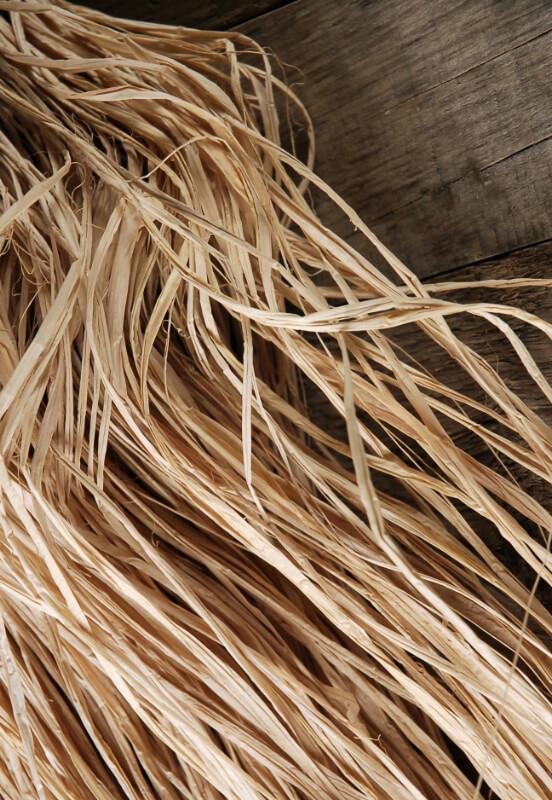
Trimmed Natural Raffia Bundle (300 grams) birthday-party-1botanicalscraftseventsfallbowl-floating-candle-holdernaturals-floralsnautical-decorthanksgivingcotton
Quick View
Trimmed Natural Raffia Bundle (300 grams)
$9.99
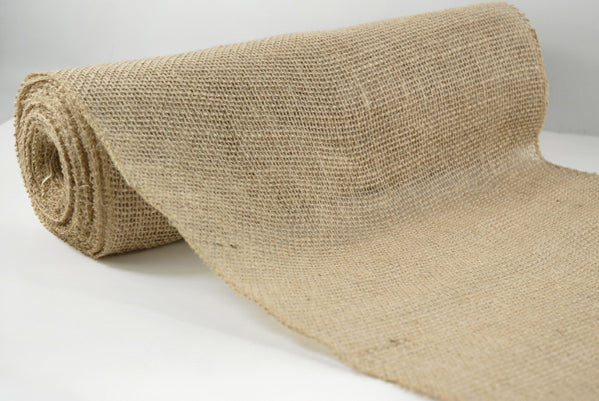
Natural Jute Roll 14" x 30ft burlapcenterpieceschristmaschristmas-suppliescraftsribbonbowl-floating-candle-holderfourth-of-julylinensreceptiontablescapeweddings
Quick View
Natural Jute Roll 14" x 30ft
$19.99
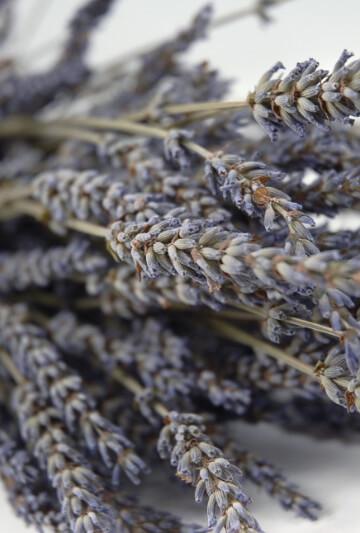
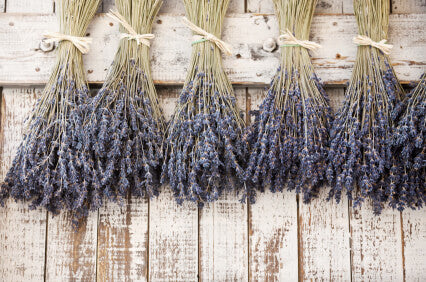
Natural Lavender Buds Stems Fragrant 120 stems botanicalsbridal-showercorsage-bouttenierecraftsbowl-floating-candle-holderfloral-suppliesfloral-wreaths-and-suppliesfloral-saleeucalyptuslavender-and-lilacnaturals-floralssale-group-asale-group-d
Quick View
Natural Lavender Buds Stems Fragrant 120 stems
$11.99
$19.99
12 Sola Flowers Cream White Chorki botanicalsbouquet-suppliesbridal-showercorsage-bouttenierecraftsbowl-floating-candle-holderfloral-suppliesflowersnaturals-floralswood-crafts
Quick View
12 Sola Flowers Cream White Chorki
$7.99
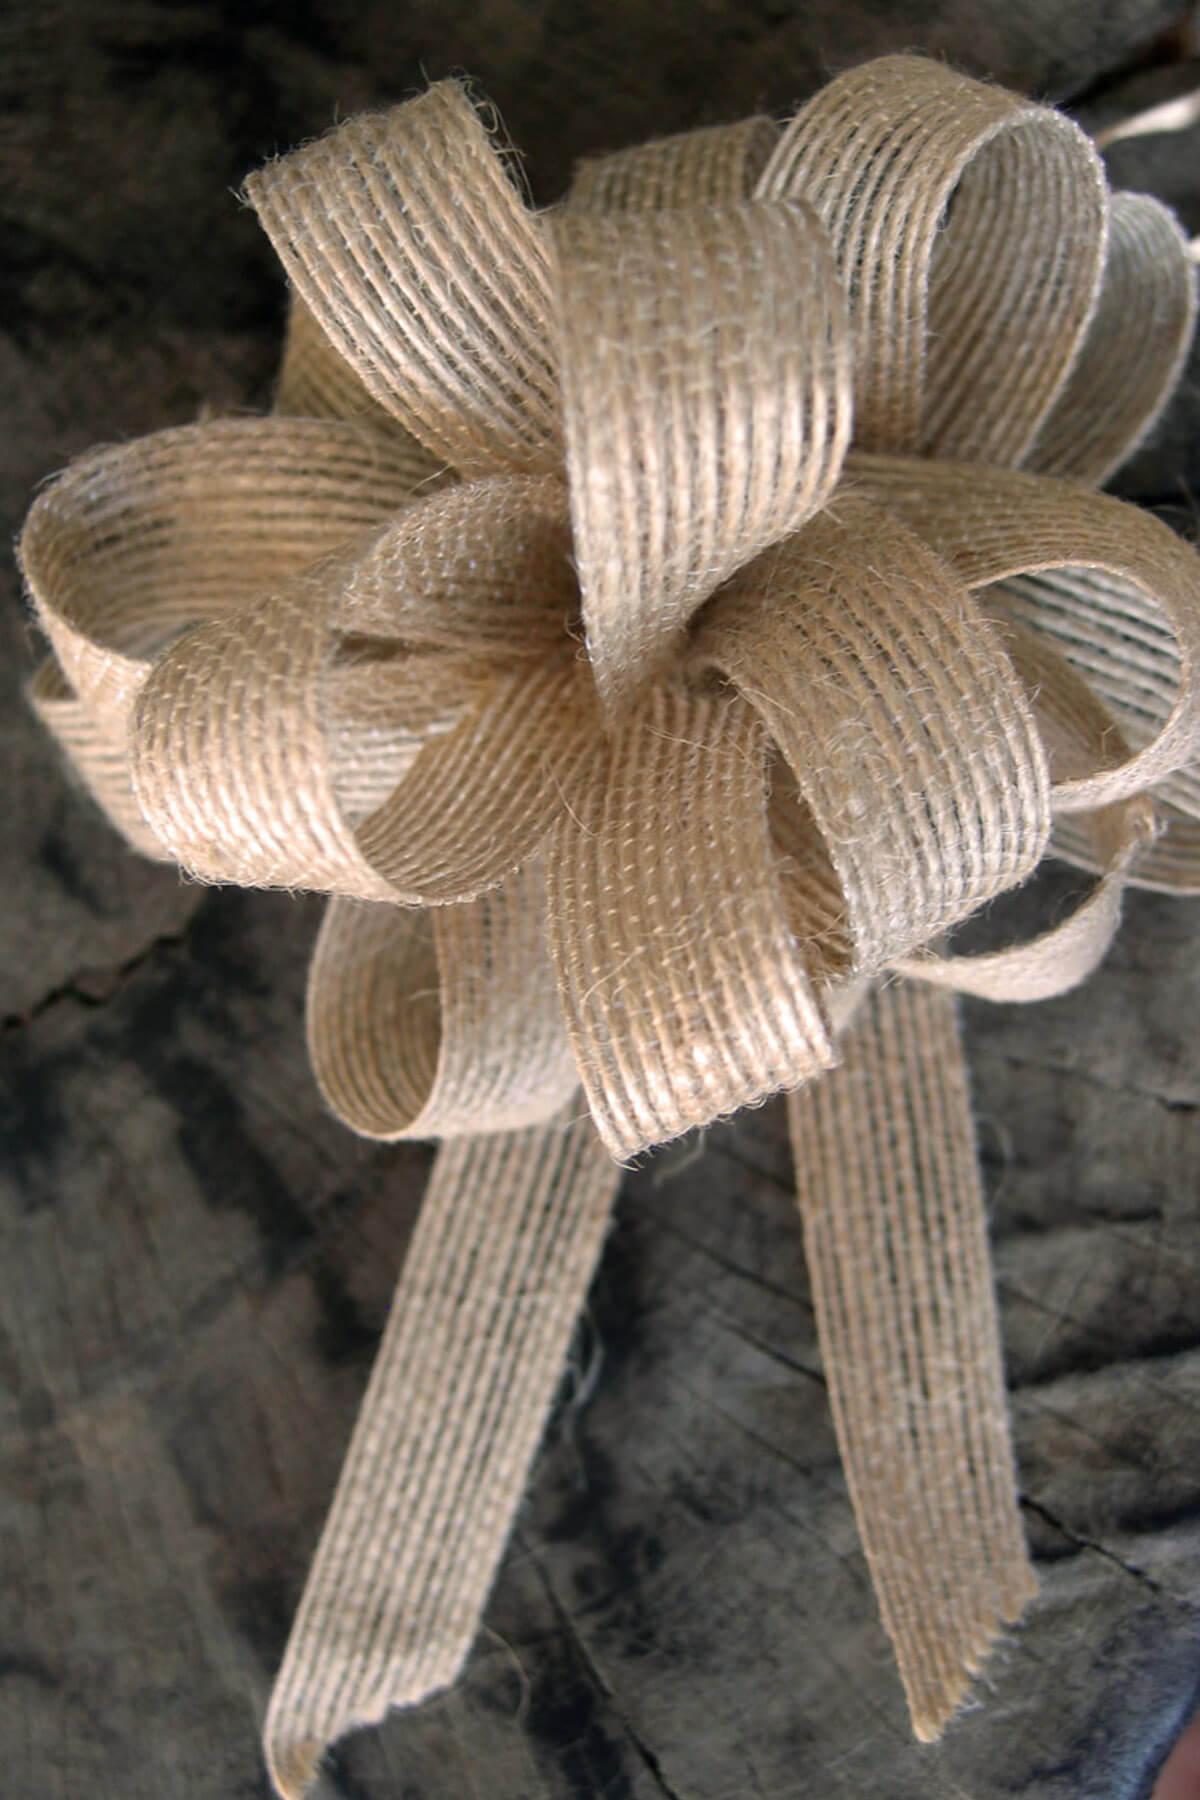
Burlap Pull Bows Set of 12 burlapchristmaschristmas-suppliescraftsribbonbowl-floating-candle-holderfloral-wreaths-and-suppliesfourth-of-julysale-group-asale-group-eunique-decor
Quick View
Burlap Pull Bows Set of 12
$9.99
$16.99
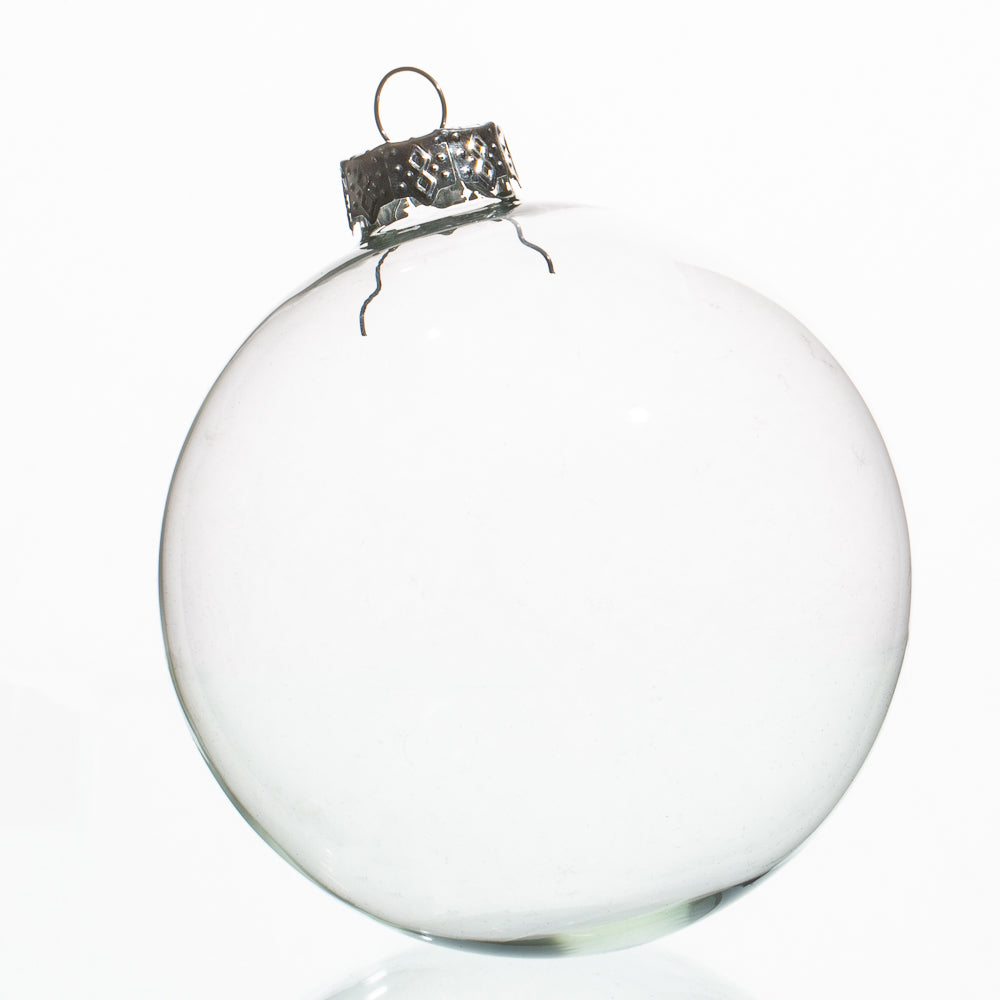
Richland Glass Ornaments 2” Clear Set of 12 christmascraftseventsbowl-floating-candle-holder
Quick View
Richland Glass Ornaments 2” Clear Set of 12
$5.99
Sold Out
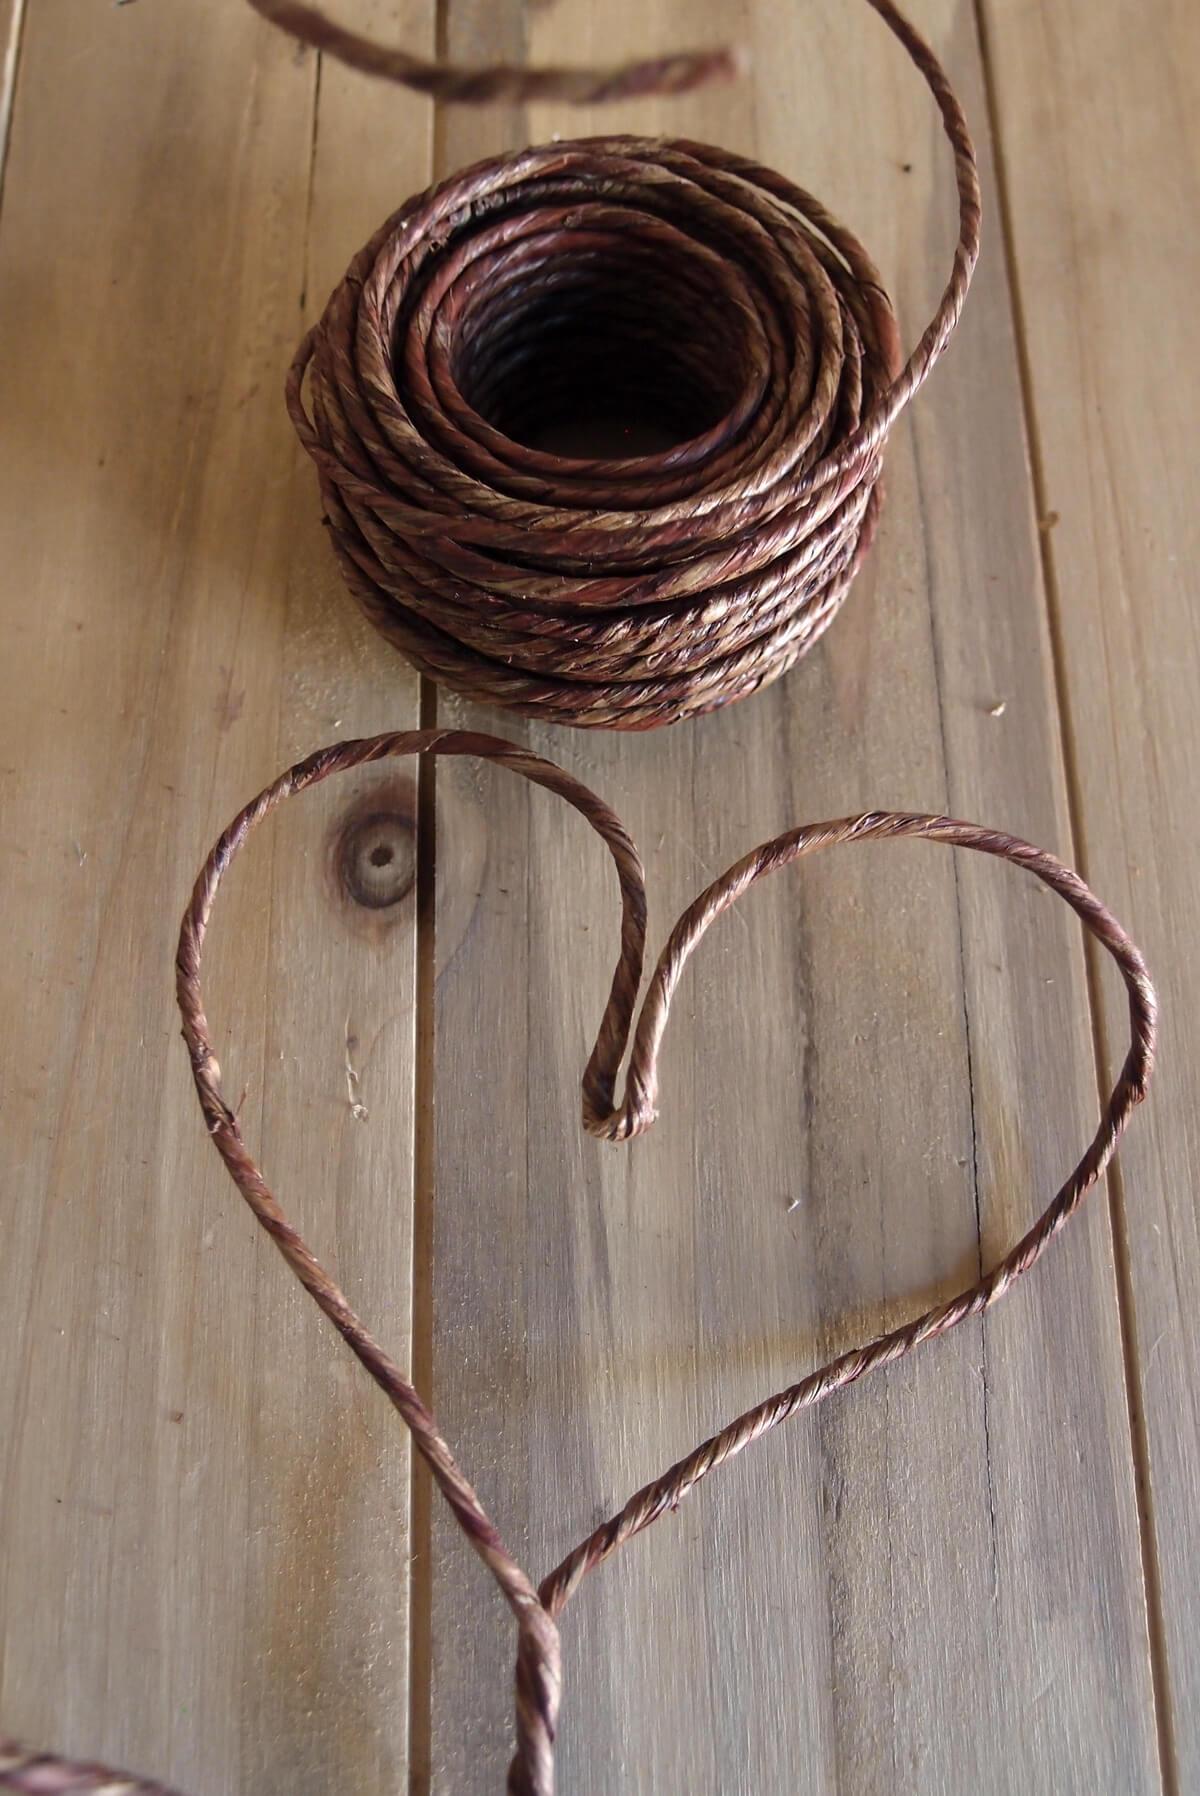
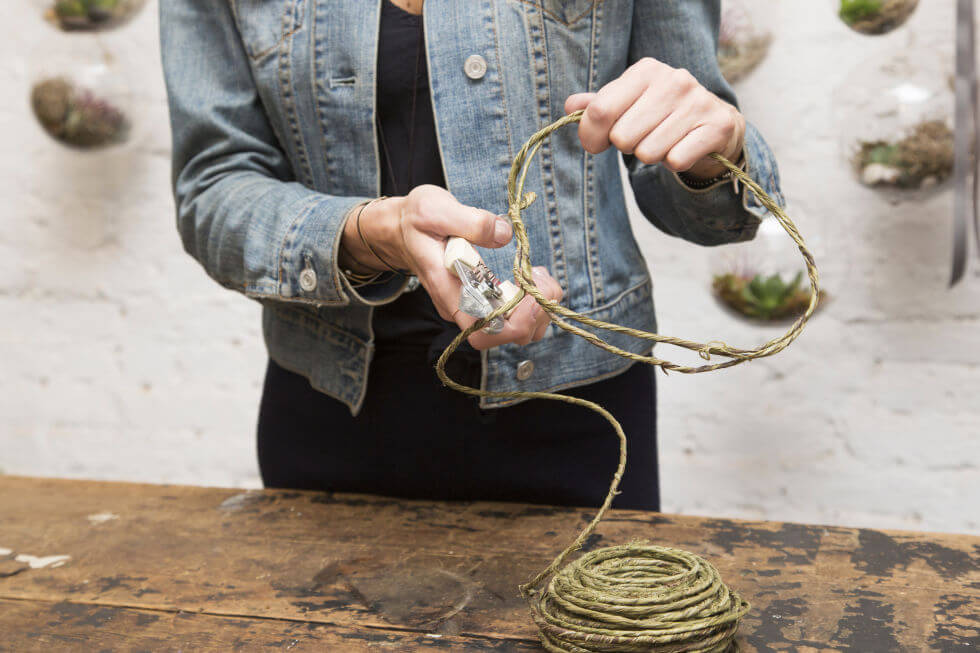
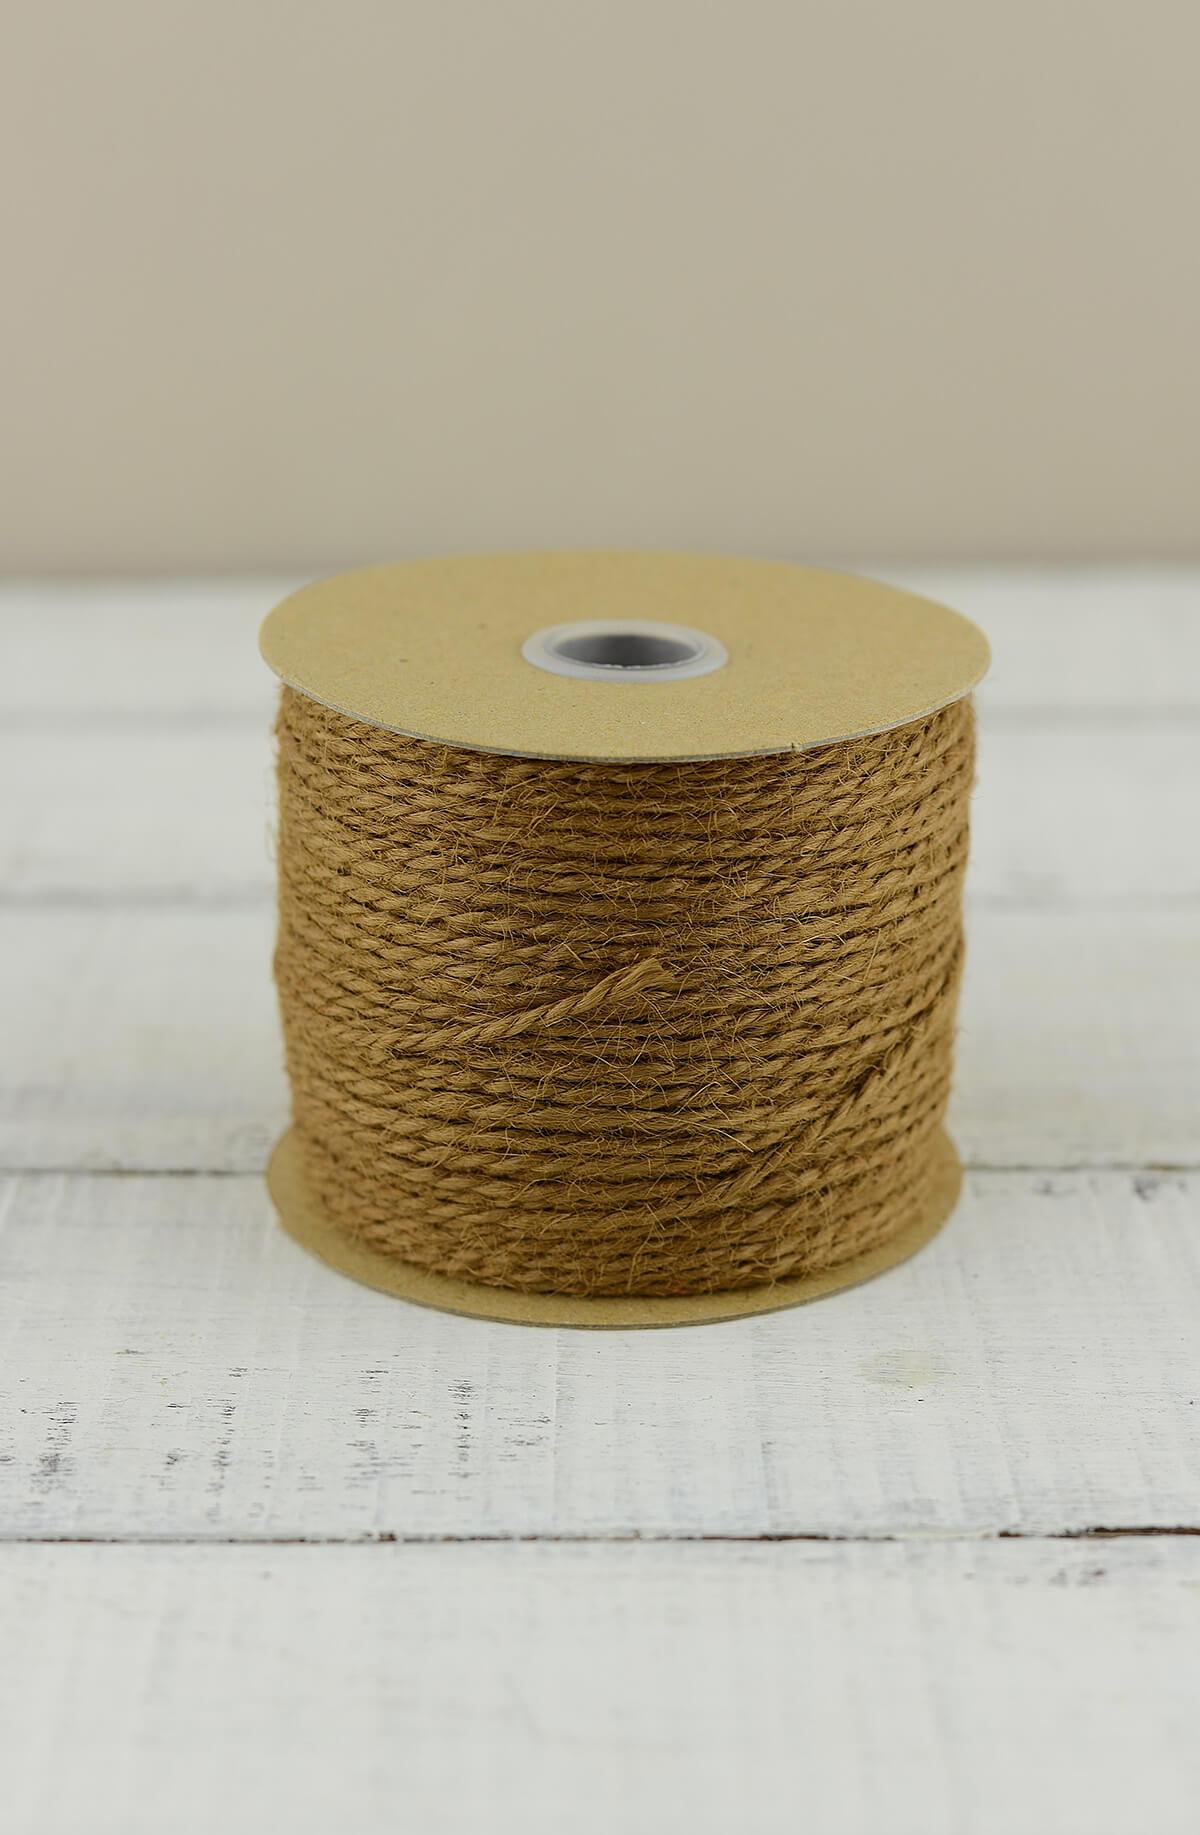
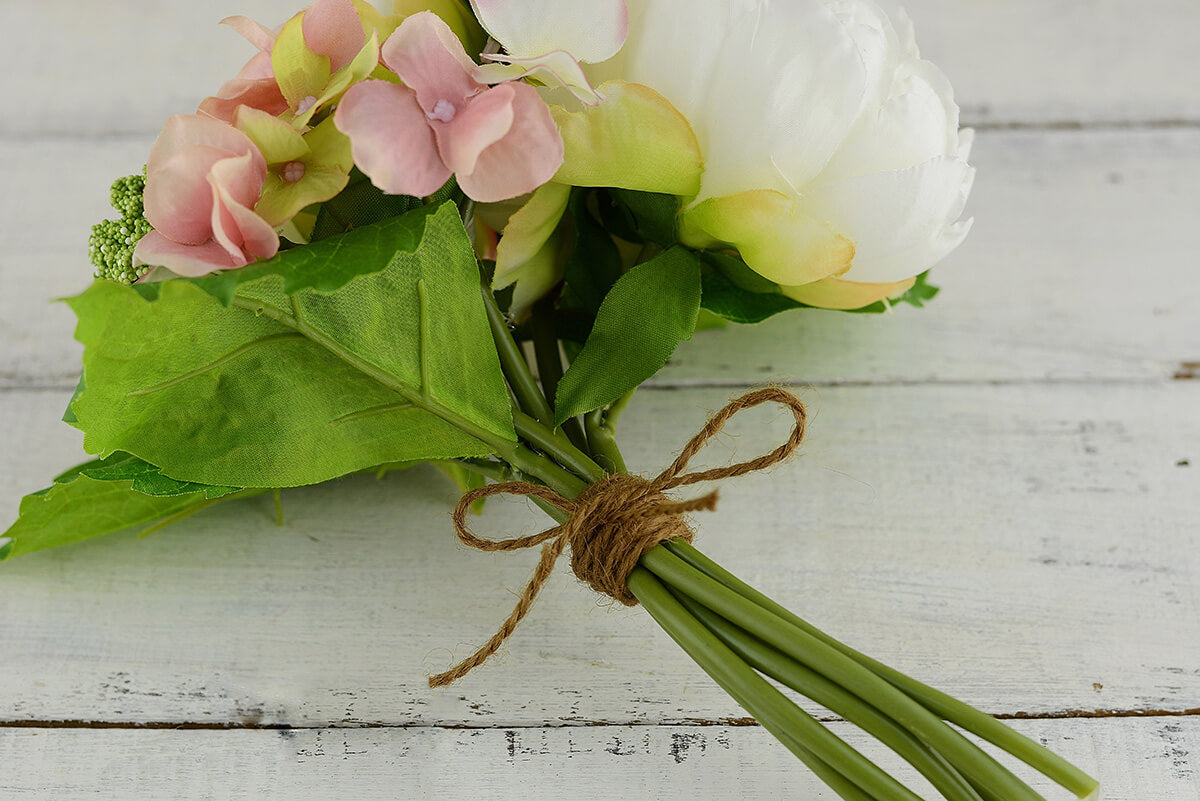
Jute Twine Cording Rustic Brown 100 yards burlapcorsage-bouttenierecraft-suppliescraftsfallbowl-floating-candle-holderfloral-suppliesfloral-wreaths-and-suppliessale-group-asale-group-etwine
Quick View
Jute Twine Cording Rustic Brown 100 yards
$3.99
$6.99
18 Sola Gilly Flowers botanicalsbouquet-suppliesconfetticorsage-bouttenierecraftsbowl-floating-candle-holderfloral-suppliesfloral-wreaths-and-suppliesfloral-saleflowersnaturals-floralssale-group-asale-group-dwood-crafts
Quick View
18 Sola Gilly Flowers
$5.99
$9.99
Richland Glass Ornaments 2.5” Iridescent Set of 12 christmaschristmas-suppliescraftsbowl-floating-candle-holder
Quick View
Richland Glass Ornaments 2.5” Iridescent Set of 12
$9.99
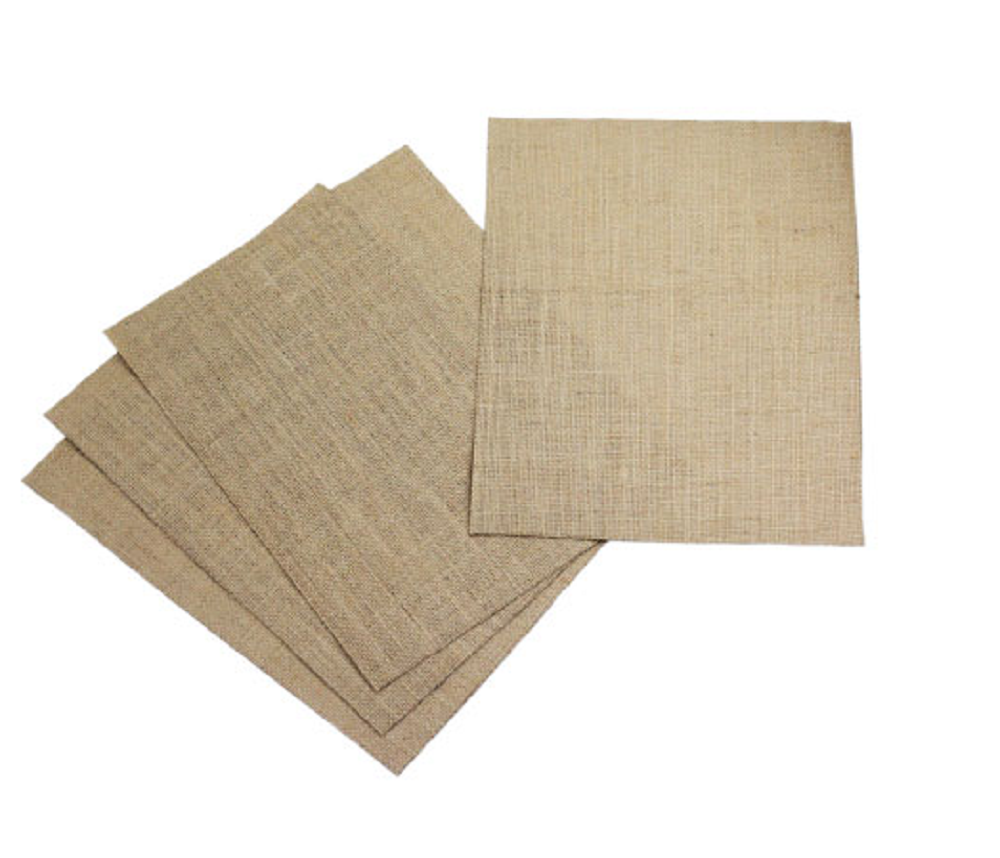
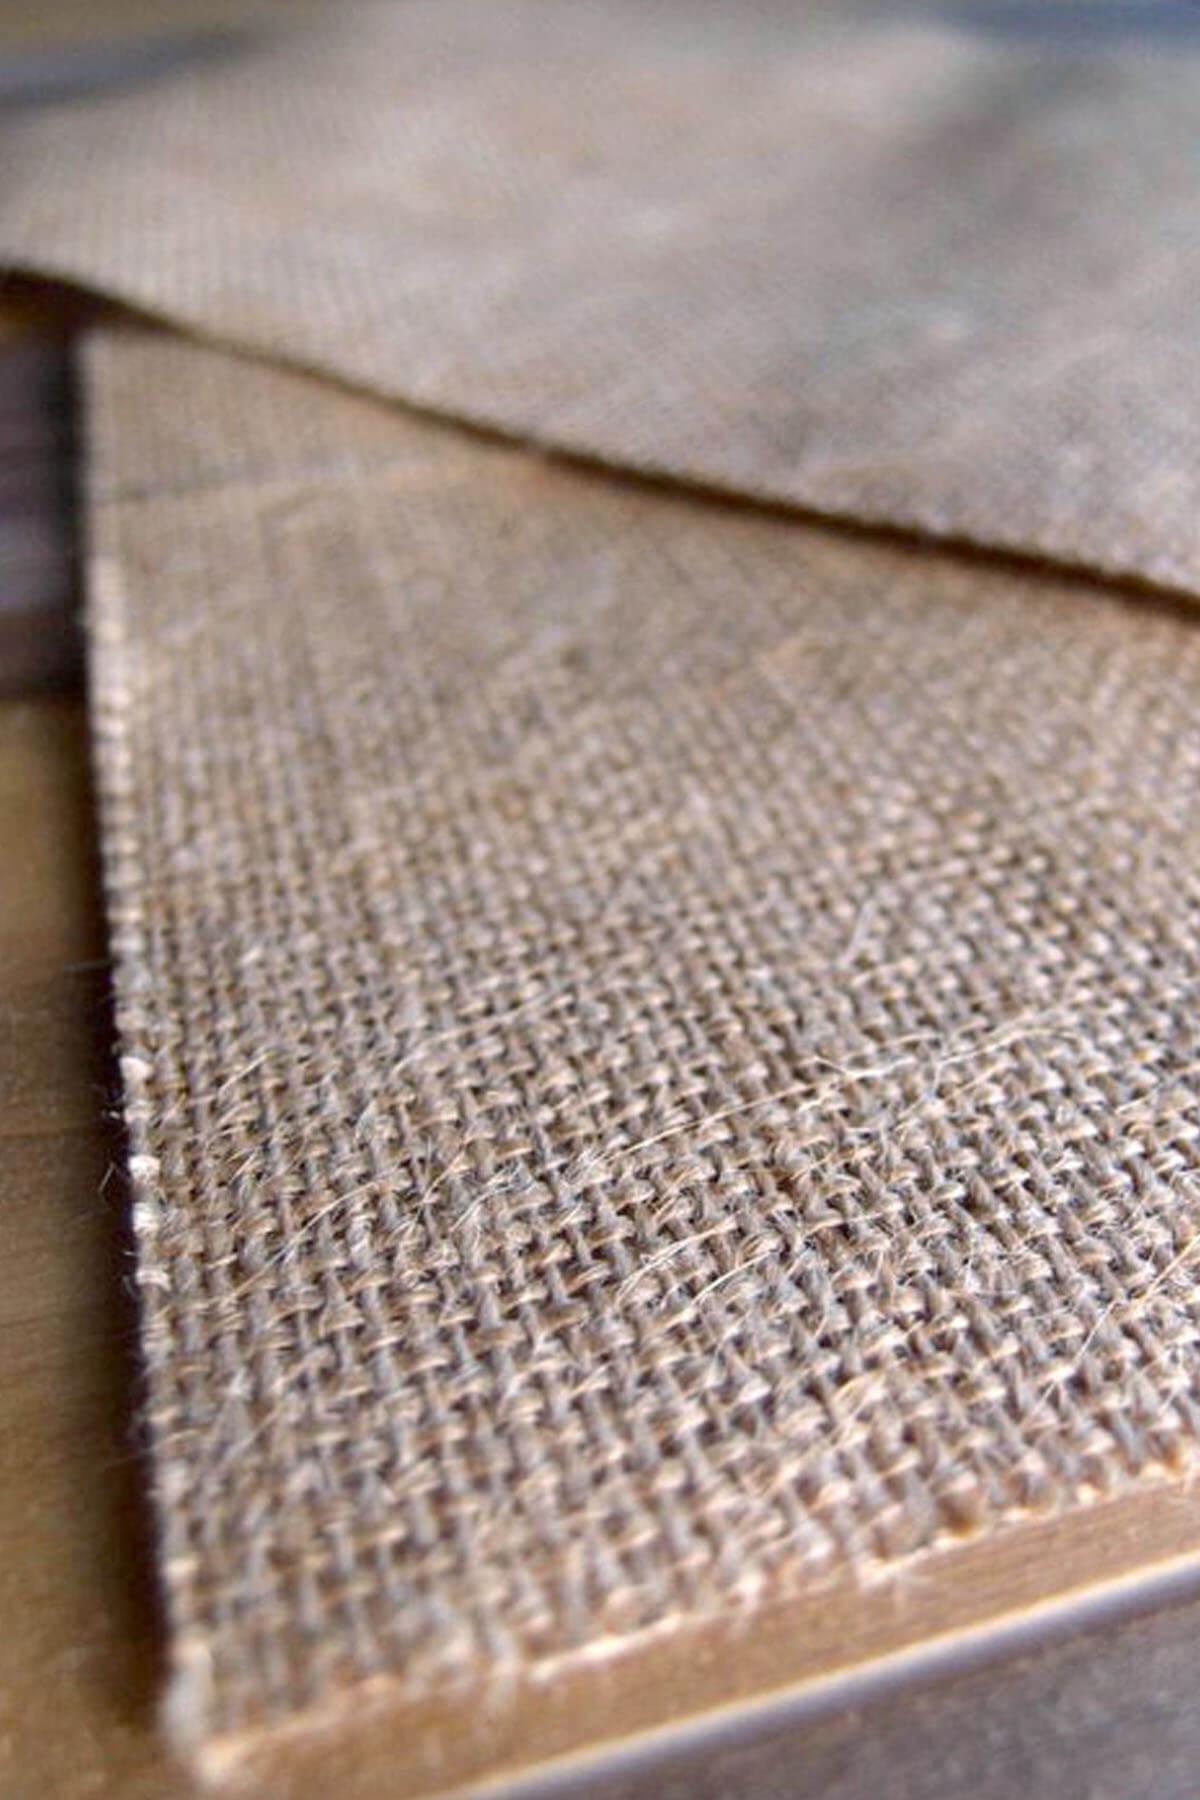
Pack of 6 Burlap Laminated Craft Sheets 8.5x11 birthday-party-1bridal-showerburlapcraftseventsbowl-floating-candle-holderfourth-of-julymarquee-letters-signs
Quick View
Pack of 6 Burlap Laminated Craft Sheets 8.5x11
$7.99
Richland Glass Ornaments 4” Clear Set of 12 christmascraftseventsbowl-floating-candle-holder
Quick View
Richland Glass Ornaments 4” Clear Set of 12
$29.99
Sold Out
Bamboo 3.5" Wooden Spoons - Bag of 12 birthday-party-1corporate-partiescraftsdecorbowl-floating-candle-holdergift-packaginghalloweenreceptionservewaretablescapewood-crafts
Quick View
Bamboo 3.5" Wooden Spoons - Bag of 12
$13.99
Sold Out
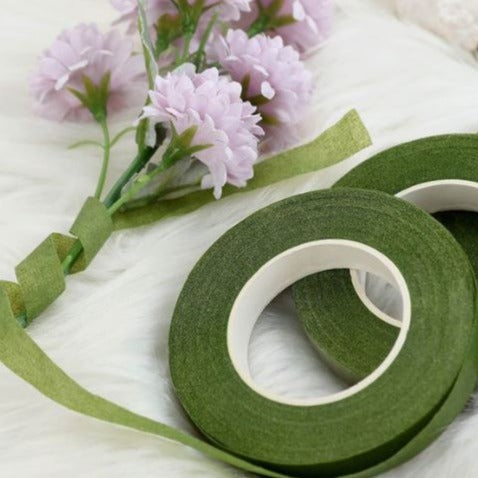
Panacea Green Stem Wrap Tape 1/2"x60ft (Pack of 3) bouquet-suppliescorsage-bouttenierecraft-suppliescraftsbowl-floating-candle-holderfloral-suppliesfloral-wreaths-and-suppliessalesale-group-asale-group-etapes
Quick View
Panacea Green Stem Wrap Tape 1/2"x60ft (Pack of 3)
$4.79
$7.99
12 Sola Juhi Flowers botanicalsbouquet-suppliesbridal-showercorsage-bouttenierecraftsbowl-floating-candle-holderfloral-suppliesfloral-wreaths-and-suppliesflowerssale-group-awood-crafts
Quick View
12 Sola Juhi Flowers
$5.99
$9.99
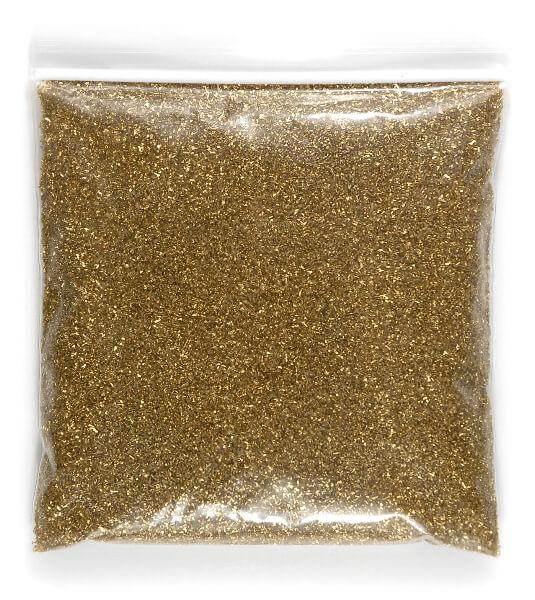
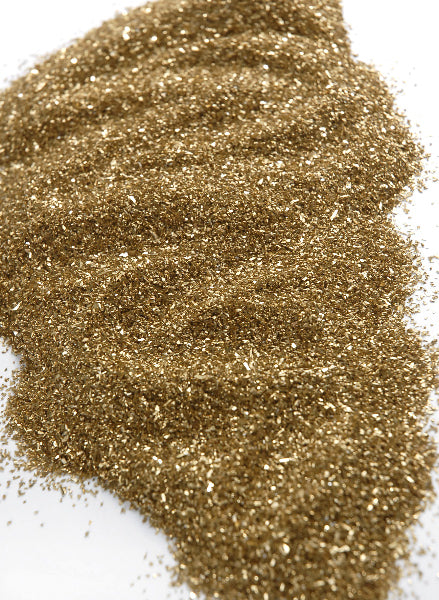
German Glass Glitter Gold 1 lb. bag bridal-showerchristmaschristmas-suppliescraft-suppliescraftsbowl-floating-candle-holderglitternautical-decorst-patricks-day
Quick View
German Glass Glitter Gold 1 lb. bag
$29.99
10 Sola Flowers on Wire Stems 7"-8" botanicalsbouquet-suppliesbouquetsbridal-showercraftsbowl-floating-candle-holderfloral-suppliesflowersstemmedwood-crafts
Quick View
10 Sola Flowers on Wire Stems 7"-8"
$15.99
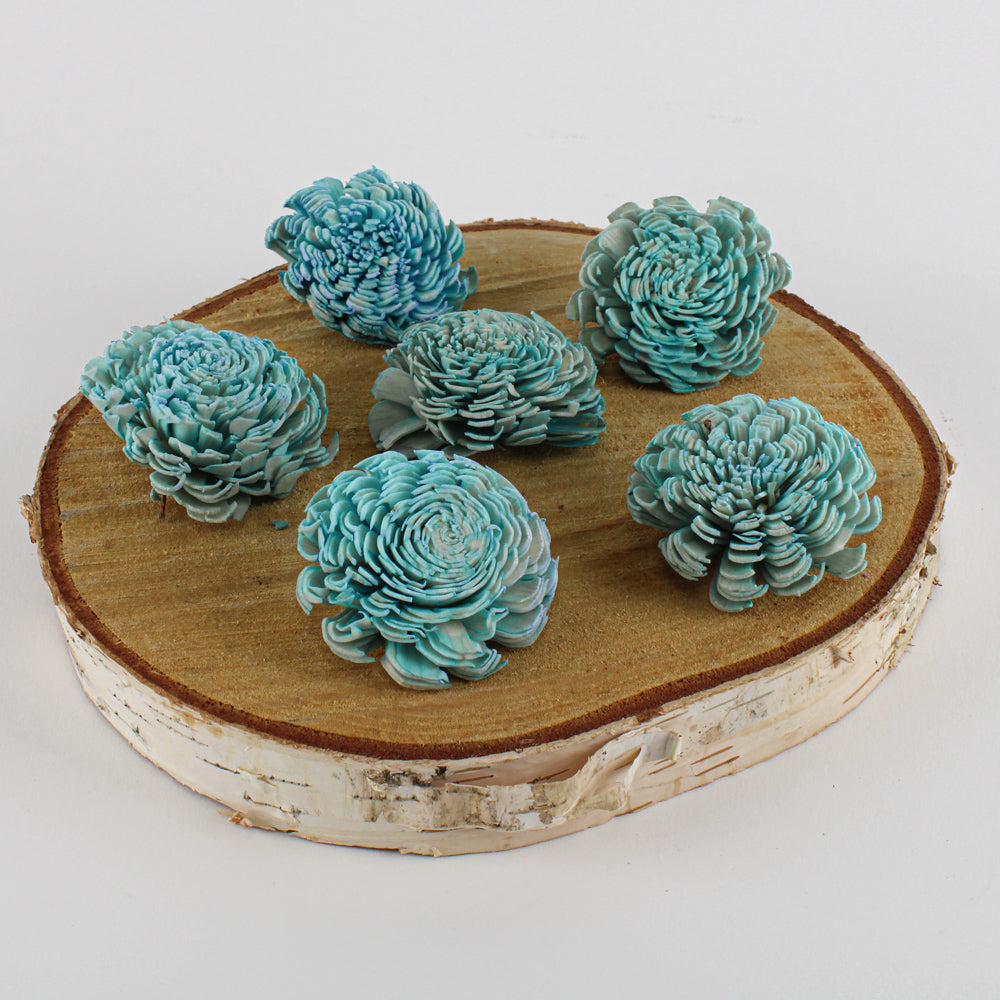
12 Sola Flowers Blue Chorki birthday-party-1bluebotanicalsbouquet-suppliesbridal-showerconfetticorsage-bouttenierecraftseasterbowl-floating-candle-holderfloral-suppliesfloral-wreaths-and-suppliesflowersfourth-of-julygarden-outdoornautical-decorsale-group-awood-crafts
Quick View
12 Sola Flowers Blue Chorki
$6.99
$11.99
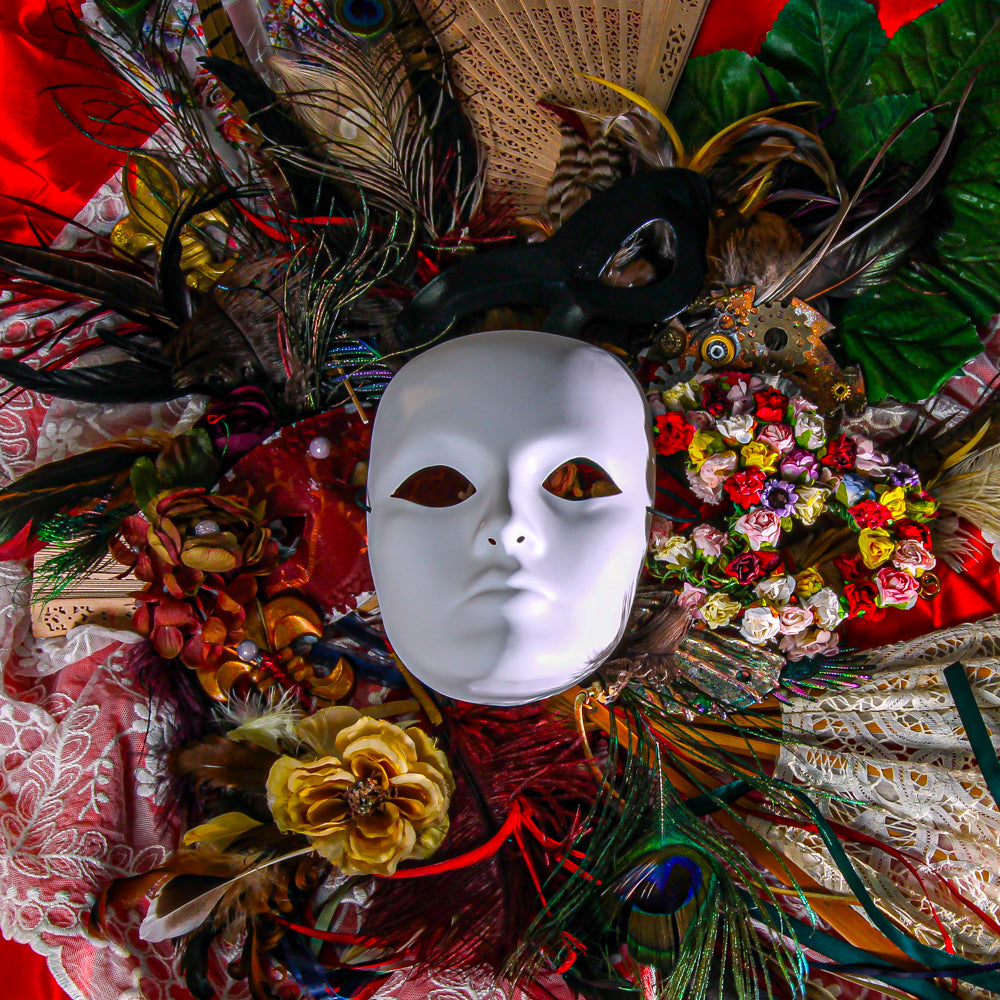
White Mask Adult Female costumecraftseventsbowl-floating-candle-holderhalloweensalesale-group-e
Quick View
White Mask Adult Female
$5.99
$9.99
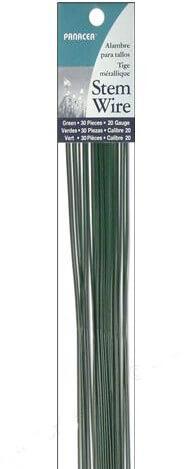
Florist Stem Wire (360 pieces) 20 Gauge GREEN bouquet-suppliescraftseventsbowl-floating-candle-holderfloral-suppliesfloral-wreaths-and-suppliessale-group-asale-group-e
Quick View
Florist Stem Wire (360 pieces) 20 Gauge GREEN
$17.99
$29.99
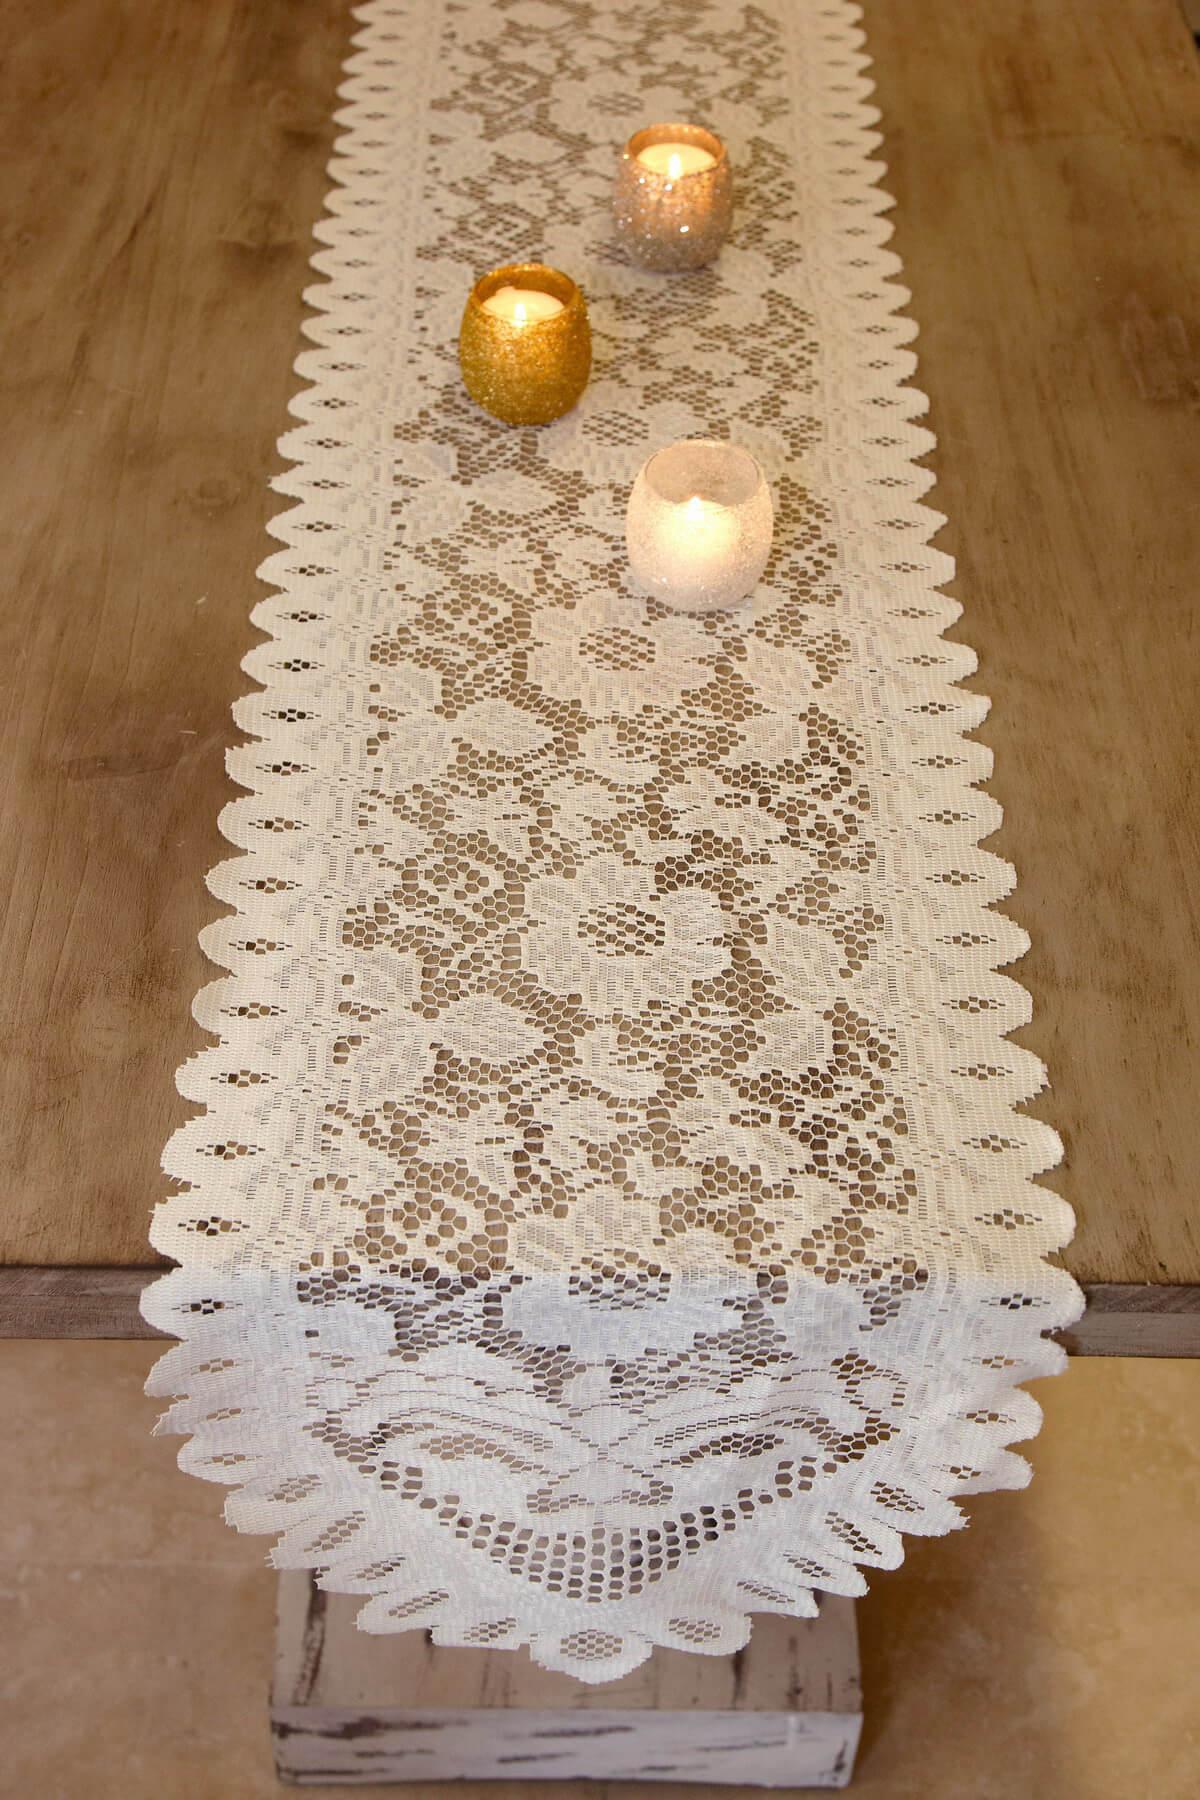
Floral Lace Table Runner Ivory 13" x 120" anniversarybridal-showercenterpiecescraftsengagement-partybowl-floating-candle-holderlacelinenspearls-lacereceptiontablescapeunique-decorvalentines-dayweddings
Quick View
Floral Lace Table Runner Ivory 13" x 120"
$7.99
Load More Products
Search