 - Home
- SPECIALS
- What's New!
- Lights, Fiber Optics, String Lights
- Lavender, Branches, Naturals
- Vases, Vase Fillers Gems
- Apothecary Jars
- Wedding & Reception Supplies
- Silk & Natural Touch Flowers
- Fall Flowers and Decorations
- Bath & Body : Bath Salts
- Decorative Bird Cages- Birds
- Natural Branches
- Bottles and Jars
- Candles, Candleholders, Candle Shades
- Charger & Base Plates
- Champagne Buckets, Ice Buckets
- Christmas Decorations - Holiday Parties
- Cake Stands - Cupcake trees
- Centerpiece Display Mirrors
- Wine Glasses- Beverge Servers
- Feathers
- Floral Florist Supplies
- Paper Lanterns, Solar Lanterns & Parasols
- Ribbons & Tulle
- Sparkle Sand
- Stanchions, Shepherds Hooks, Tulle Stands, Arbors , Lanterns
- Kids Gifts, Crafts and Activities
- Home and Garden Decor
- Party Event Lighting Decorations
- Gifts & Gift Wrapping
- Scrapbooking Paper Crafts Xyron
- Baby Shower Decorations
- Reusable Eco Friendly Grocery Bags - Totes
- Lights & Magnifiers: Daylight, Mighty Bright
- Sewing Quilting Knitting
- Beading - Jewelry Supplies
- Books
- Art & Craft Supplies
- Projects & Inspiration
- Shipping Info
- Contact us
|  |


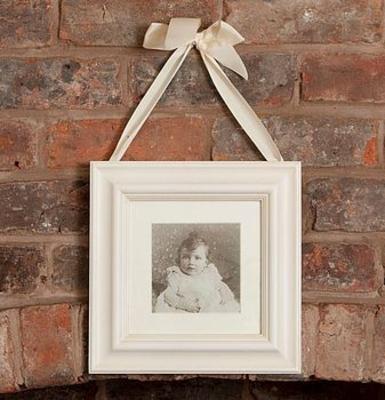
| Three
Looped Picture Hanger Ribbon Bow |
This
ribbon bow is for decoration only. You don't want to use it to actually hold
your pictures on the wall. Use a regular picture wire to support its weight
and attach this ribbon for a finished decorator look.
.You
will determine the amount of ribbon yardage you need when you measure how much
streamer you want showing below your picture (or even between two or three
pictures in row). Adjust your loop size and tail length to be in proper proper
proportion to your picture(s).
Three Looped
Picture Bow Yardage
depends on length of tails Use 3 yds for a large bow.
1. Start with one long tail.
2. Make a loop to the left.
3. Make
a loop (the same size) to the right.

4. Make
one more loop (the same size) to the left.

5. Roll the ribbon over your
thumb to make a small center loop and twist the ribbon so the tail is right
side out. Your second tail should be the same length as your first. Adjust the
second tail length by adjusting your center loop size. Wire tightly through
center loop.
6. Pull the third loop up to the
top to complete the bow. Cut tails to desired length in "V"s.

|
Ribbon Instruction: See next
lesson (The Puffy Bow)
See below for more on bow making.
|
Savings
everywhere you look!
|
HOME |
wedding
& reception supplies| vases |candles |
candleholders & hurricane shades| lights | wreath stands, stanchions, shepherd hooks, arbors | flutes, stemware
| floralytes|wine buckets | charger plates | table centerpiece mirrors |
bottles, jars |
cake stands | ribbon & tulle | silk & natural touch flowers, decorations, garlands | floral
supplies | party
& event supplies| kids
craft supplies | home
decor | sewing | scrapbooking & cardmaking
| adhesives | books|
paper lanterns and parasols | naturals, branches, dried botanicals
|bath
salts|reed diffuser supplies, reeds, oils, base |
holiday
| links & resources| About Us|
customer service |
If you
have any questions, please e-mail us at customerservice@beverlys.com
or call us at (831) 768-8428 or (831) 768-8439
© Copyright 2000-2009
Beverly Fabrics, Inc. All rights reserved |
Save-on-crafts.com
is a premier site for catering, special event planners and wedding planners
for wedding and reception supplies."Best wedding supply site" 2008. Including floralytes, fiberoptics, lights, stemware, natural touch flowers, freeze dried petals, eco-friendly confetti and decorations. Also find craft tools and supplies
including papercrafts, scrapbooking, adhesives, beading, floral supplies,
vases, and lots of party supplies. Appropriate descriptive keywords include: wedding supplies,
special events, table top, tulle, favors, event lighting, reception, weddings.
|