Your Cart is Empty

DIY How to make a Layered Bow
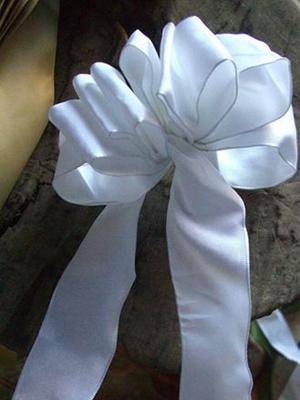
Layered BowA layered bow is two (or many) bows layered on top of each other and held together with the wires from the topmost bow. The wires on the other bows are cut close and the top bow has a center loop. The bottom bow is the largest and has the longest tails.Tools
- Wire Cutters
- Scissors
- Pliers (for tightening wires on the heavy material.)

2. With the right side of the ribbon facing out, make a loop one side. (8" of ribbon makes a 4" loop)

3. Make a full twist of the ribbon so the right side of the ribbon is still facing out and make a loop toward the other side.

4. Continue alternating loops right and left, fully twisting the ribbon as you go, until you have made the required number of loops on each side. Put florist wire around the center and twist it tightly at the back of the bow. The wire should be tight enough so the loops move independently and can be adjusted to make a full, fluffy bow.

5. To make a center loop, twist the remaining ribbon around your thumb before securing the center with wire. Adjust the tail so the right side of the ribbon is facing out like the first tail. Put a wire through the center of the loop and twist it tightly at the back.

6. Wire the bows together.
